Preface#
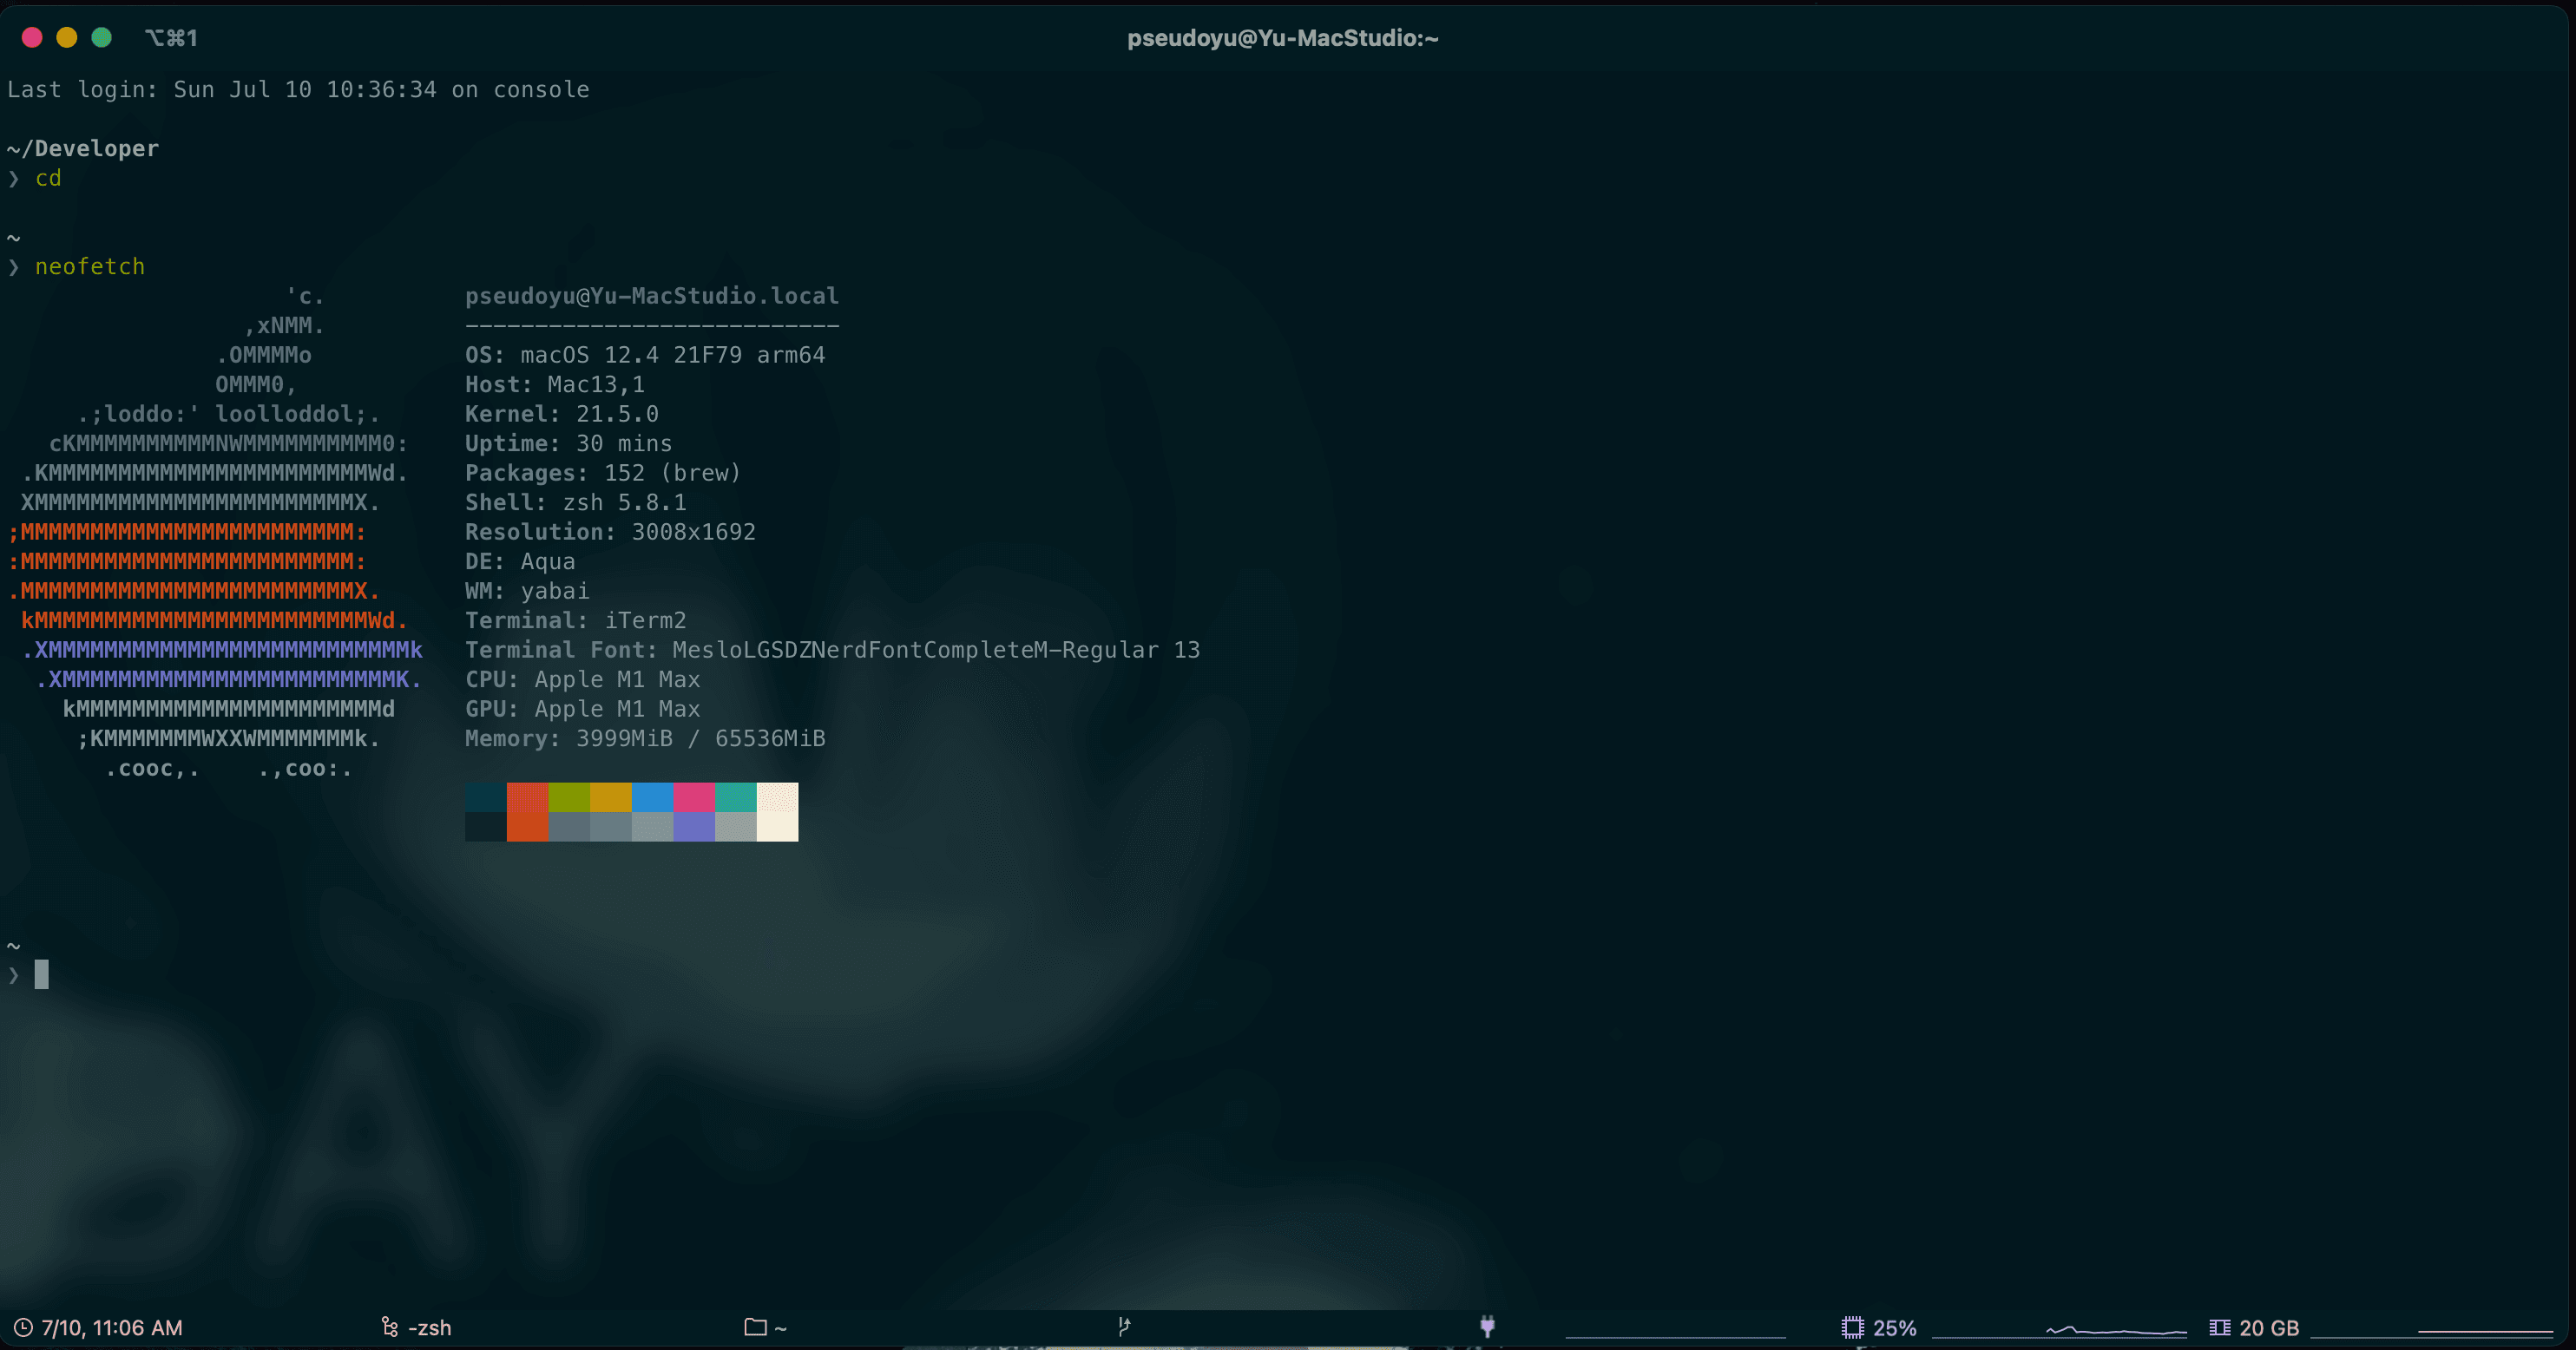
As a developer, whether debugging code locally or deploying projects on remote servers, the terminal shown in the image below is indispensable, often depicted as a black window in tech movies.
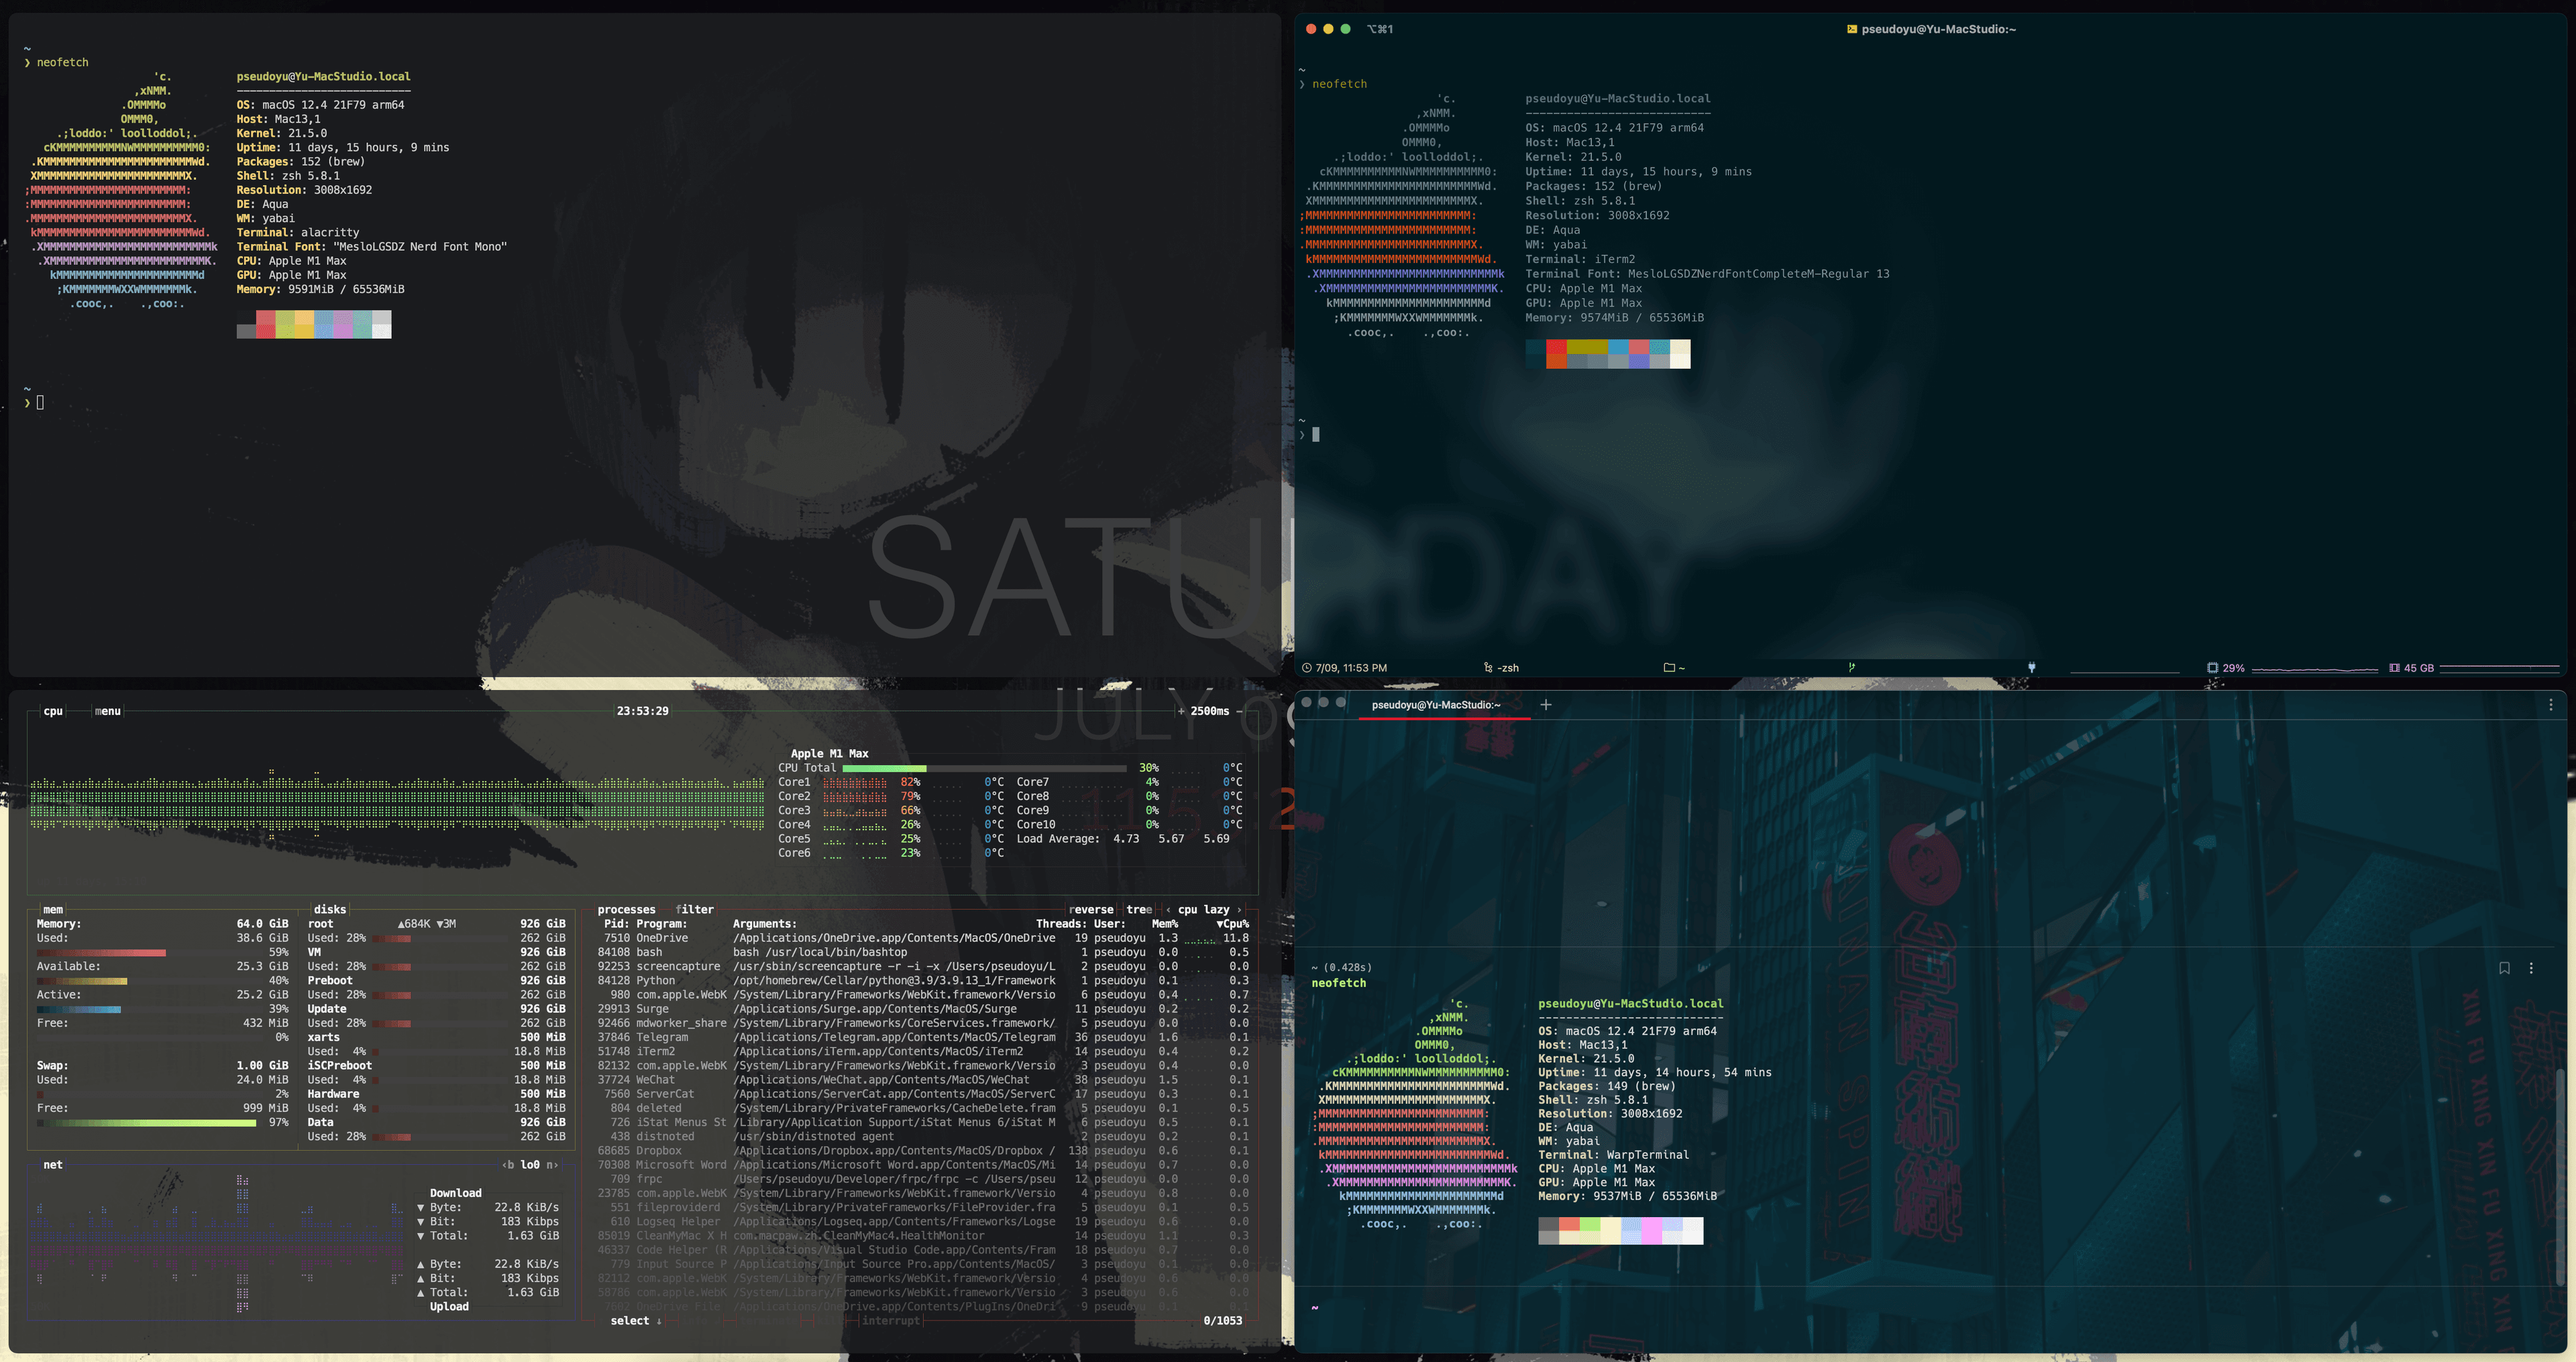
Each operating system generally has its default Shell, such as "Powershell" in Windows, and bash, zsh, etc., in macOS and Linux; systems with graphical interfaces also come with terminal emulators pre-installed, such as "Terminal.app" on macOS and terminal programs included in various Linux distributions.
As a productivity tool enthusiast and someone who values aesthetics, I have never stopped tweaking and beautifying my terminal configuration, going through several iterations. Unlike most developers, I am not an advocate for any specific solution but rather try various tools, configuring them according to my habits to reduce operational differences between solutions, seamlessly switching between them based on usage in daily development, and sometimes even randomly selecting one to change my mood.
This article mainly discusses my terminal solution choices and configuration details.
Terminal Configuration Requirements#
Terminal configuration can be divided into several aspects:
- Tool Configuration. When developing on macOS or Windows, we often need a terminal emulator to connect to our local development environment or remote servers. This is usually a permanent application in our development process, and its aesthetics, response speed, and shortcut keys significantly affect our development experience, making it a key focus of our configuration and beautification.
- Functionality Configuration. When using the command line to perform operations on system services/files, we need to use Shells like bash, zsh, etc. Configuring command prompts, auto-completion, and other features can effectively enhance our user experience.
- Integration Configuration. In addition to running common command-line tools like git, the terminal often needs to meet advanced needs such as text editing and multi-task management. Therefore, achieving deep integration of tools like vim and tmux through terminal configuration is also an important part of optimizing our development experience.
I have sorted out my terminal usage requirements and listed the following core points:
- Minimal Style. As a software that I need to face for long periods every day, even the fanciest theme can become tiresome and affect my attention. Therefore, my basic approach to configuring the appearance and operational logic of terminal tools is Minimal Distraction, simple yet not monotonous.
- Fast Response Speed. Initially, I focused on aesthetics and functionality in my terminal configuration, installing many plugins, but this led to a poor experience with several seconds of delay each time the software opened. Therefore, the response speed during use is also a key focus of my solution selection and optimization.
- Customizability. Since I use the special "HJKL" keys for my code editor and window management, I also hope to have relatively flexible shortcut key configurations to reduce the cost of switching between different software.
- Portability. I often need to operate on different devices and occasionally have device iterations, so I hope my configuration can be easily ported to new devices/servers, ideally reusing the same configuration file.
- Expandability. I hope to expand some features and plugins according to my needs, such as using fzf to search for files or command history, jumping to specified directories via commands, and using waka-time to track my programming time.
My Terminal Configuration Description#
Even with clear requirements, finding suitable tools and configuration solutions remains a challenging yet enjoyable task. Next, I will describe the solutions I am still using and am relatively satisfied with, providing my configuration files for reference.
Additionally, since I spend most of my time developing on macOS, my terminal tool configuration is primarily based on the macOS platform, but some tools or plugins (like Alacritty, ohmyzsh, Neovim, etc.) are cross-platform, and the configuration methods are quite similar, allowing for reference and configuration based on actual situations.
Warp#
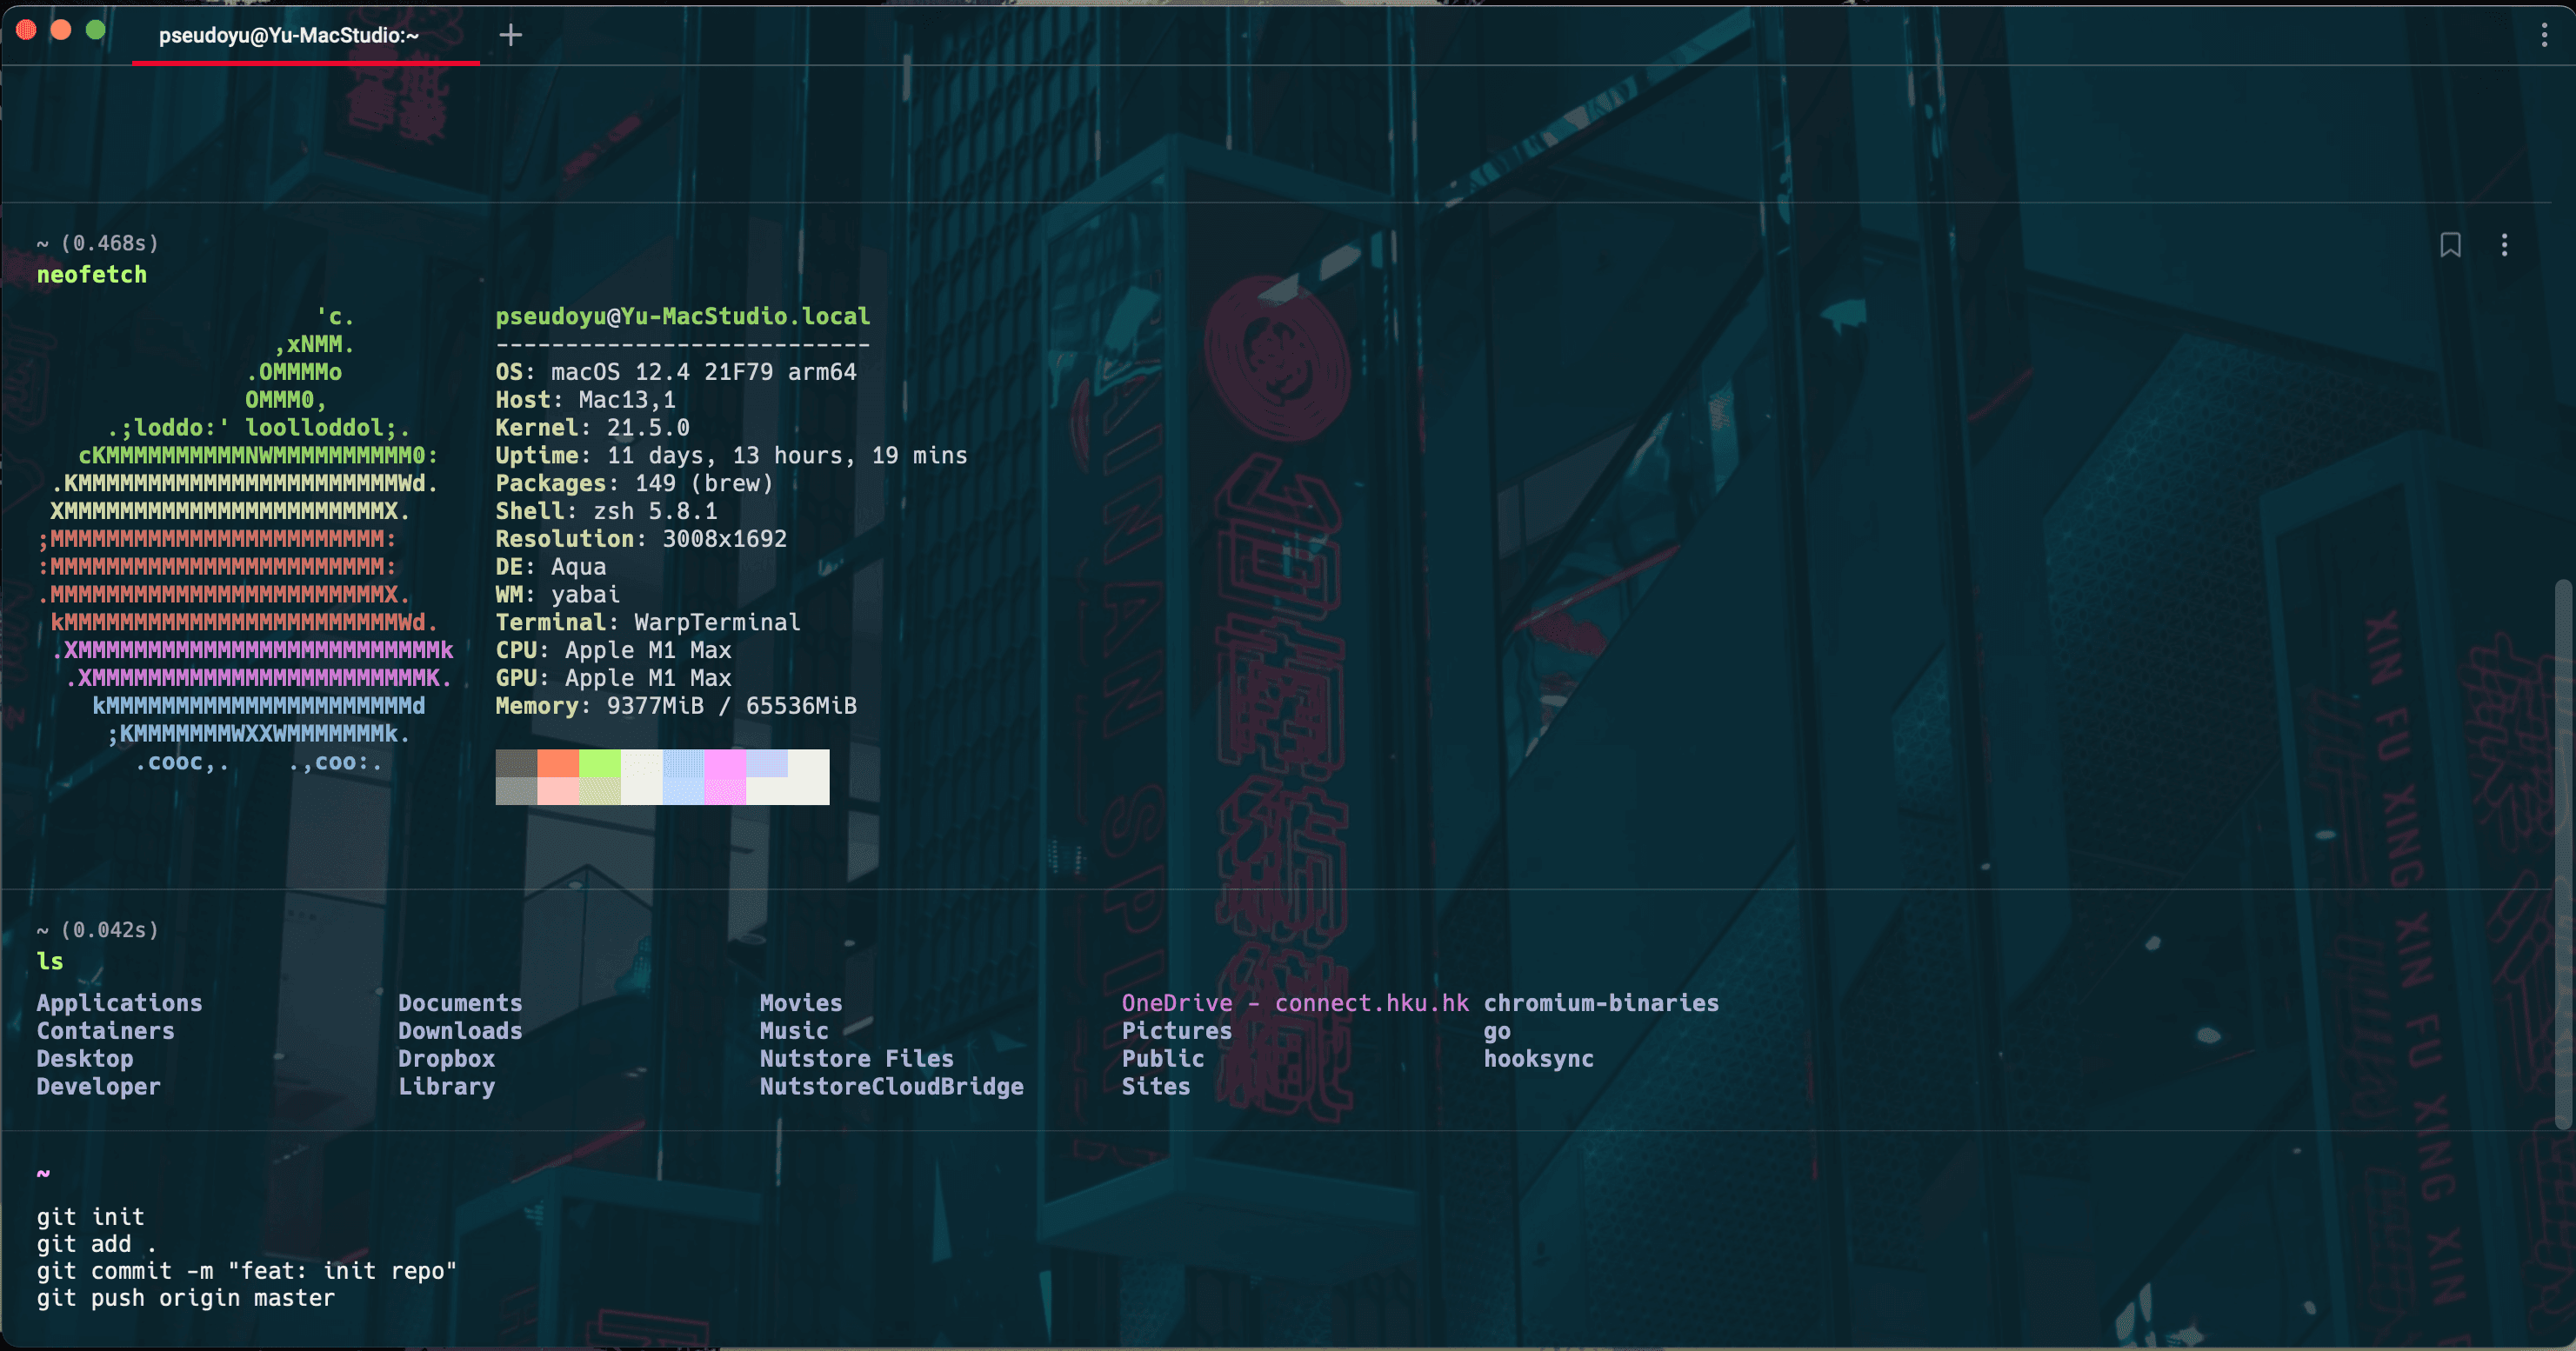
I am someone who enjoys tinkering and desires enough customization space for various configurations. However, if I had to recommend a single tool to beginners who have just started using the terminal, I would unhesitatingly choose 'Warp'.
Warp is a modern terminal tool developed in Rust that is extremely fast, powerful, and ready to use out of the box. It supports intelligent prompts, AI command search, command history queries, custom workflows, and more without requiring additional configuration.
I was among the early users who participated in Warp's beta testing, and even in its early stages when features were still lacking, I was amazed by its exquisite appearance and smooth user experience. Because it is developed in Rust, Warp's command execution and response speed are very fast, and it also has many built-in common features, allowing us to obtain powerful functionality support without configuring various plugins for history search, command prompts, etc., at the Shell level.
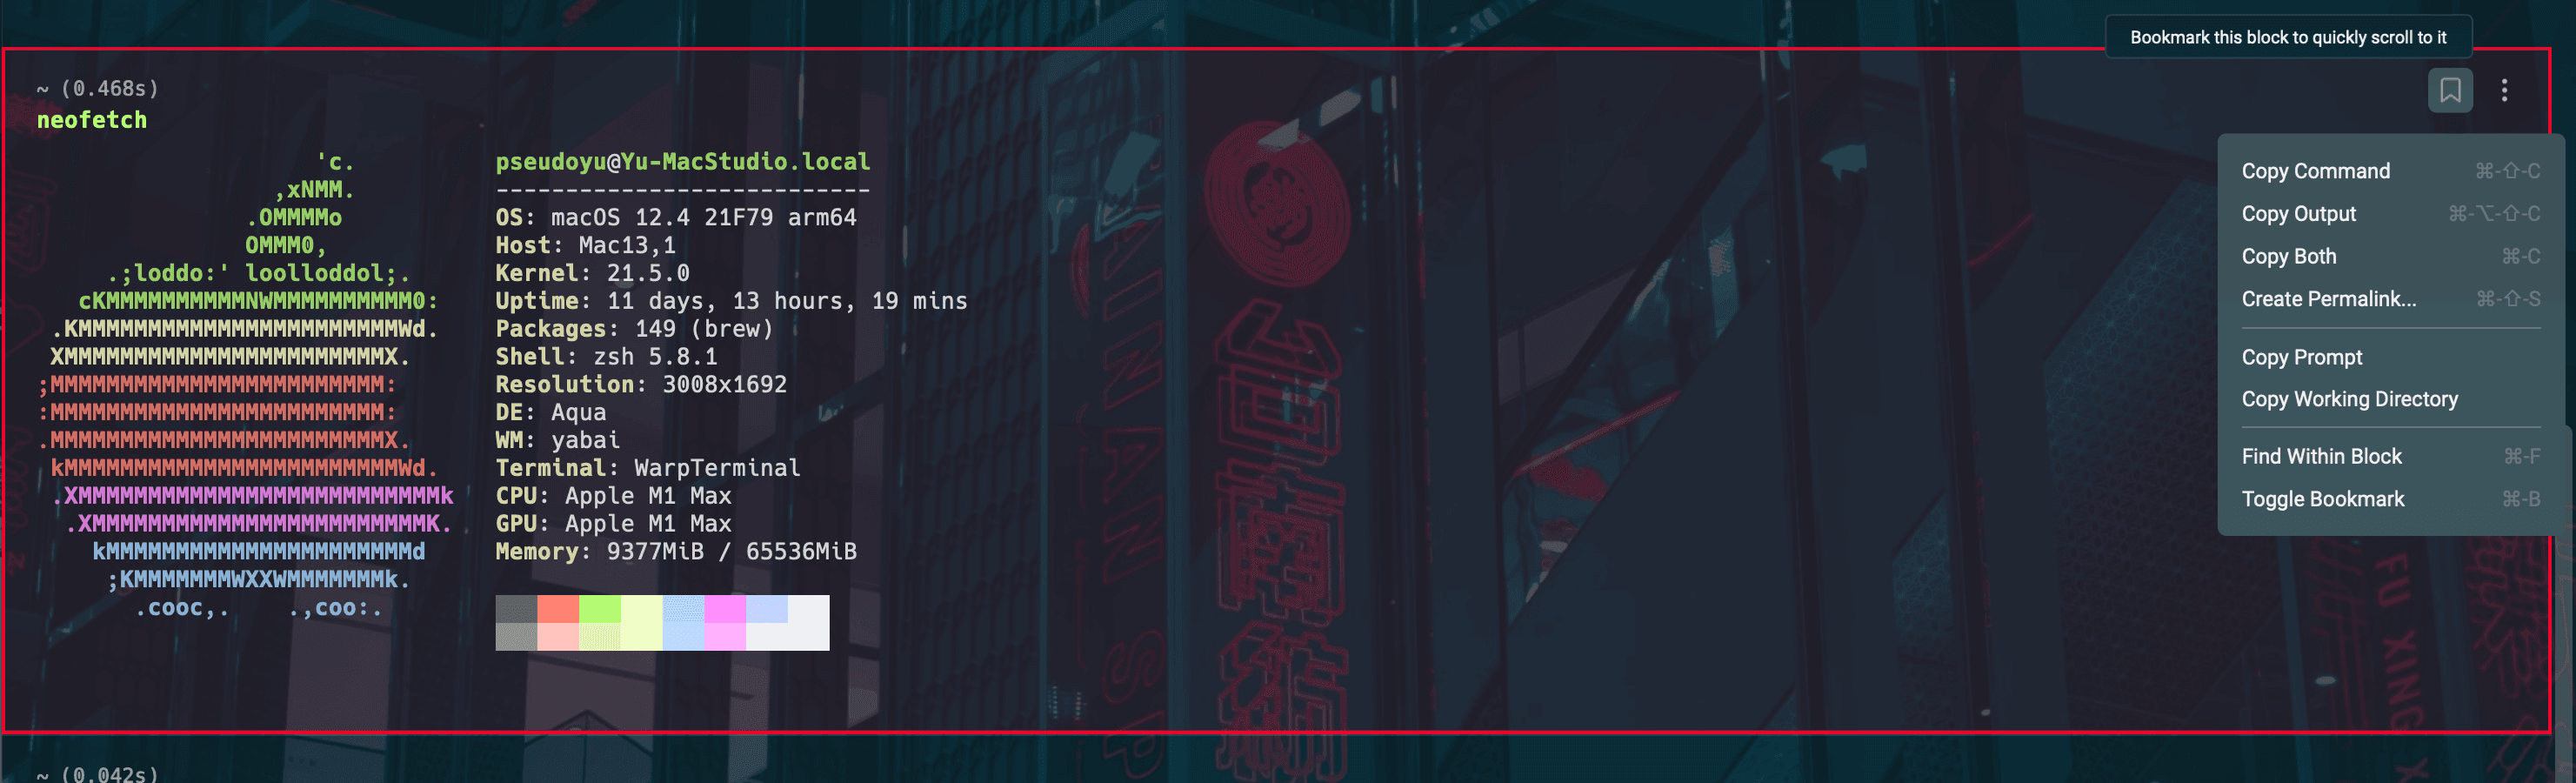
It also has many unique features not found in traditional terminals, such as the concept of "blocks," where each command's execution is presented in a "command block" format. You can navigate between blocks using the arrow keys, avoiding the need to scroll through lengthy command outputs; additionally, we can bookmark specific blocks, copy commands, search content, or even share online through the upper right corner.

Unlike conventional terminal tools, Warp's command input window is fixed at the bottom (more akin to an IDE), visually separating our command input from result feedback; its input mode is similar to a text editor, allowing us to move the cursor freely with the mouse or keyboard to edit, modify commands, or input multiple commands for sequential execution, which I consider to be Warp's killer feature.
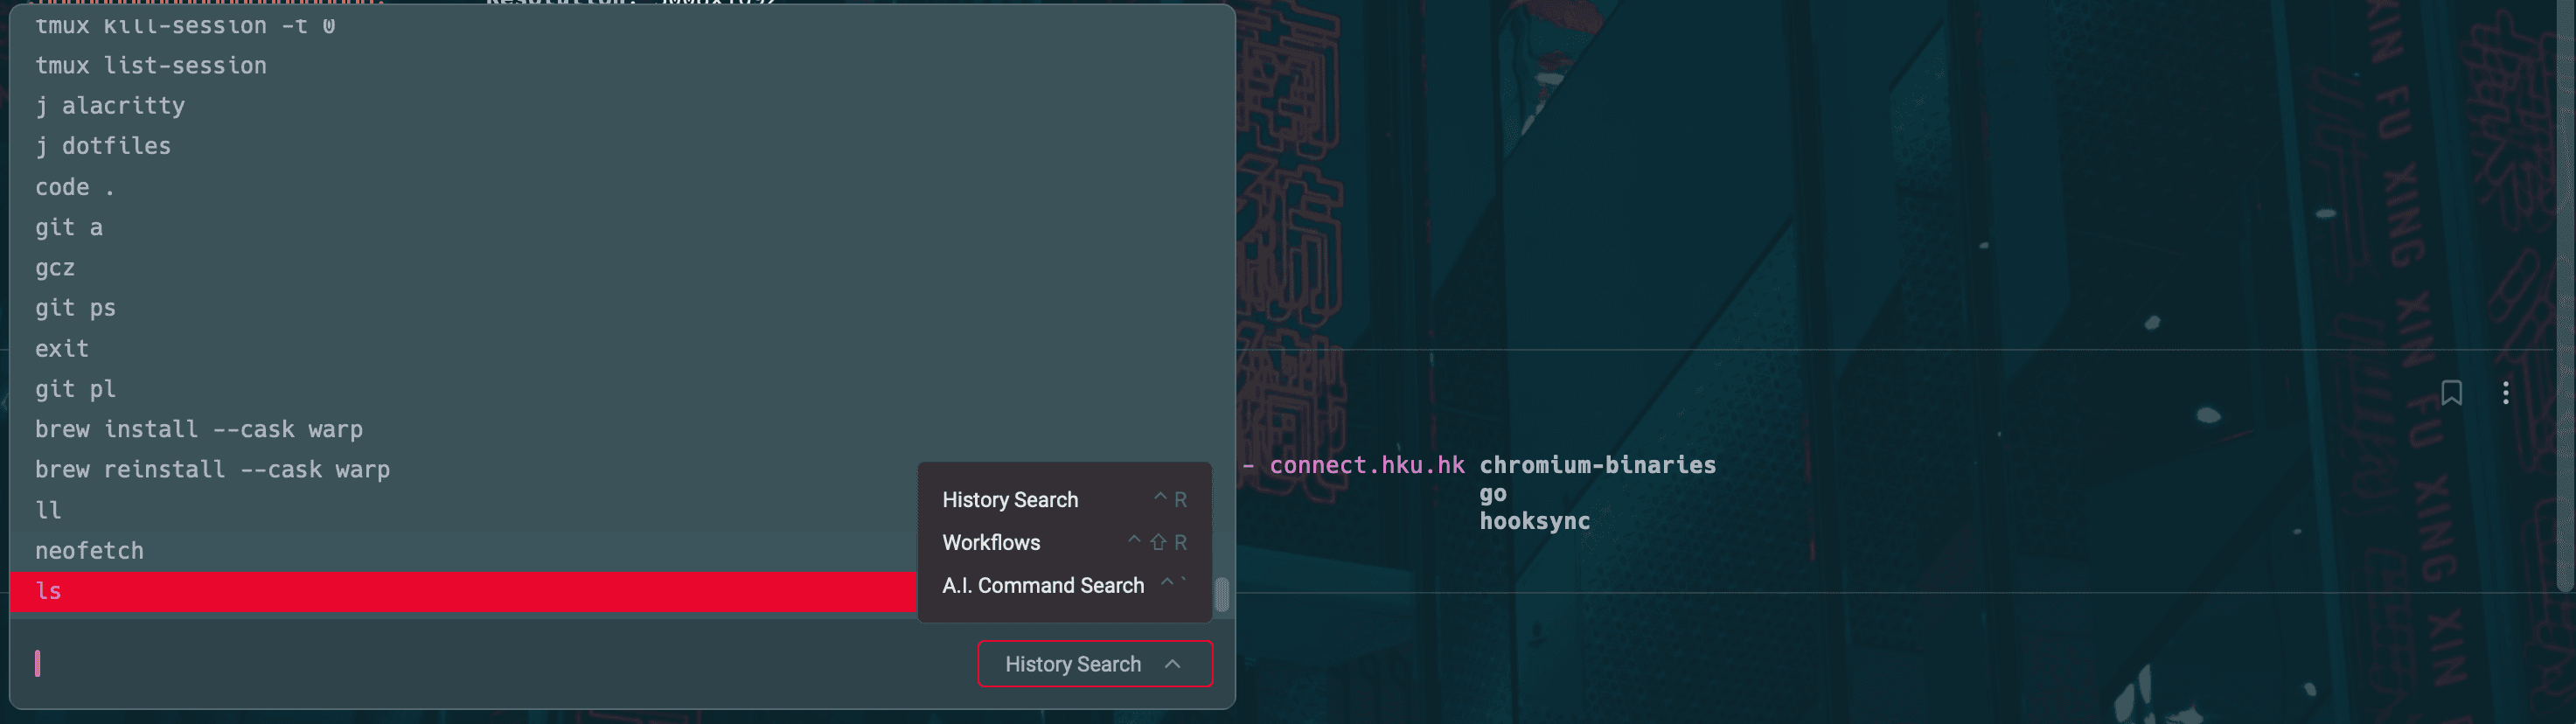
We can simply use the corresponding shortcut keys in the input box to invoke history search, custom workflows, and other features, and we can select using the mouse wheel or arrow keys, making it very flexible. Even more powerful is that when we use Warp to connect to a remote terminal via SSH, these shortcut keys remain effective, such as history search, without needing configuration on the target server.
Additionally, it's worth mentioning that we can horizontally or vertically split the terminal using the built-in shortcut keys Command+D and Command+Shift+D, without needing to integrate other tools or perform additional configurations.
With the advancement of technology, text editors have continuously evolved, adding rich features and providing better user experiences, while the terminal, which we developers interact with daily, has developed slowly. Warp has emerged at this stage, and as its official website describes:
The terminal for the 21st century.
iTerm2#
Before using Warp, my primary terminal tool was iTerm2, which I believe is also a must-have software for many developers when they first get a Mac (after all, the default terminal's aesthetics and playability are lacking). iTerm2 is a classic terminal tool that combines aesthetics and functionality, and even its default configuration meets our needs well.
Appearance and Color Scheme#
I modified the configuration of a YouTuber 'Takuya Matsuyama' to create a minimalist aesthetic scheme.
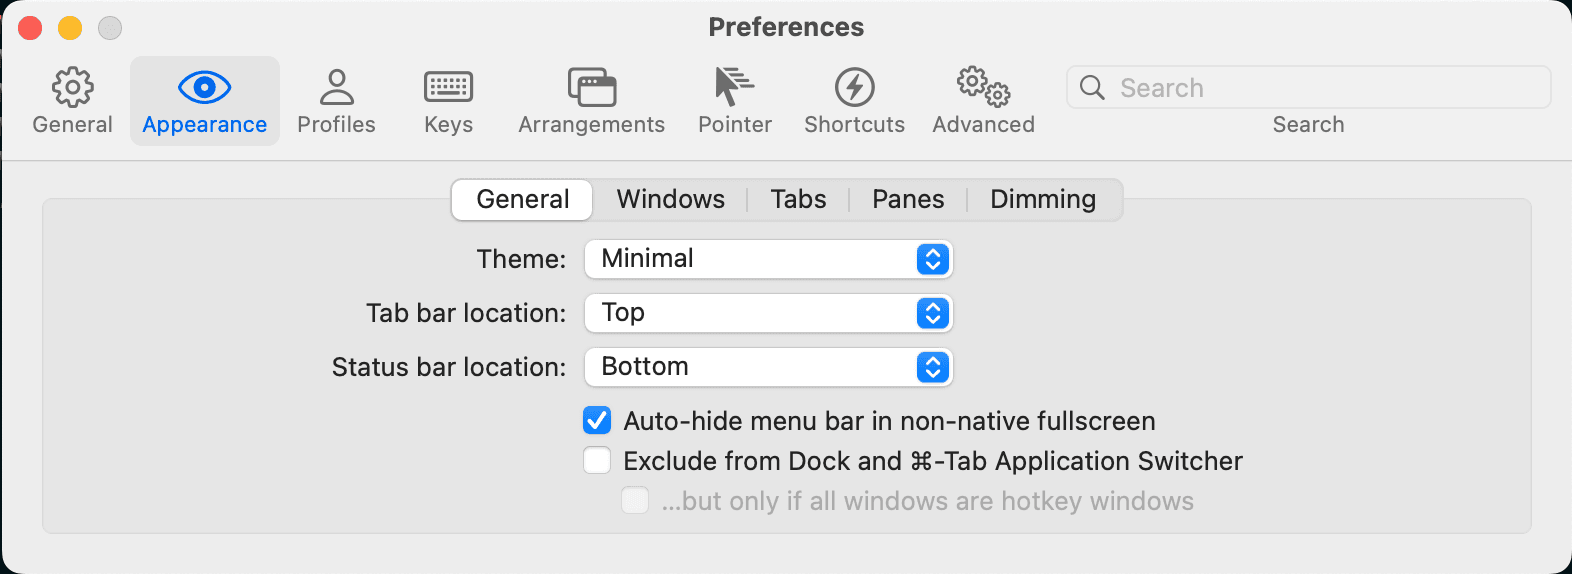
First, in Preferences - Appearance, I configured the theme, tab bar, and status bar as follows to maintain a relatively simple layout.
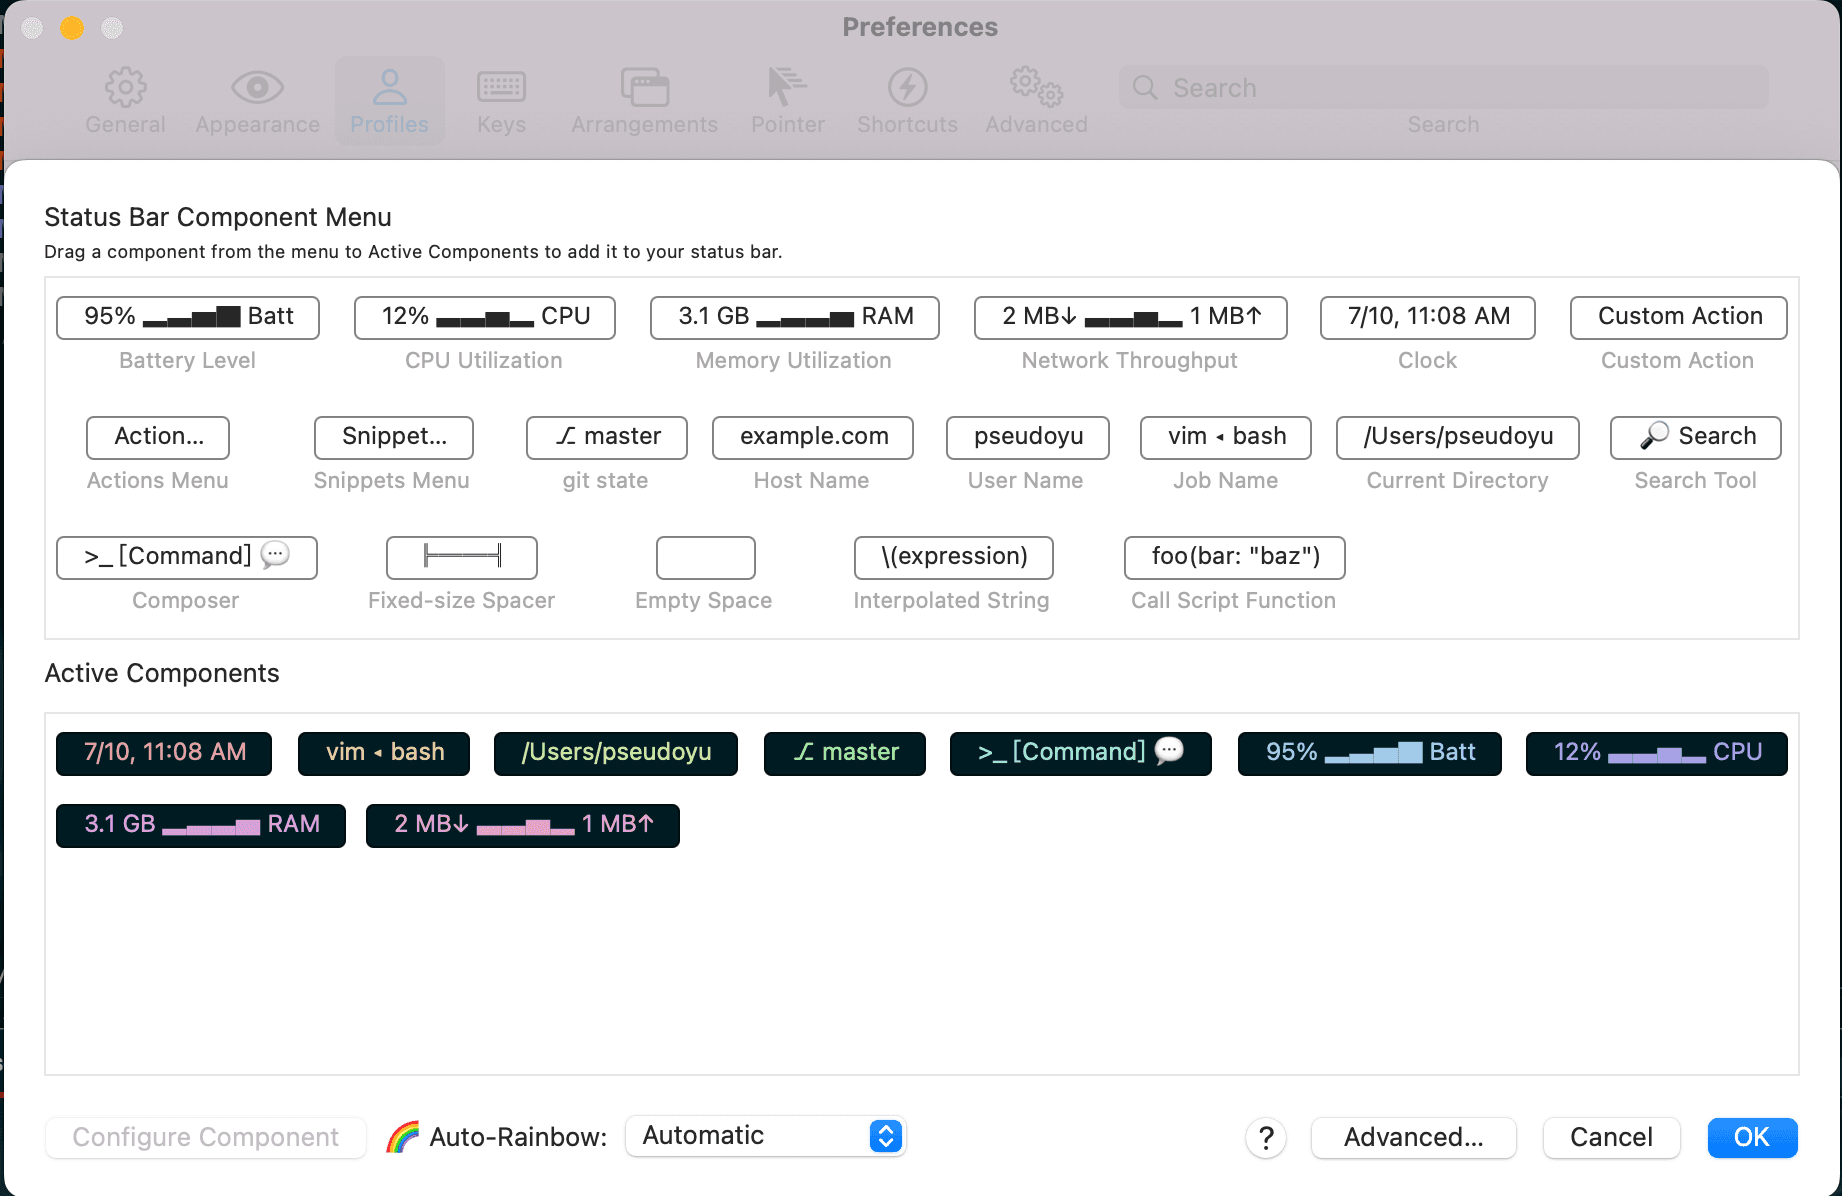
After completing the theme configuration, right-clicking the bottom status bar allows for detailed configuration. I selected some status bar components to display device status in real-time, which can be chosen based on personal preference.
In the Profile - Colors panel, select your theme color scheme or import other color schemes. You can click here to download my configuration file, import it, and adjust it according to your needs.

After selecting the color scheme, I adjusted Transparency and Blur to achieve a transparent background and frosted glass effect (i.e., window blur), which can be adjusted based on the visual effects of specific devices.
After configuring the terminal tool, we also need to configure the Shell to integrate some custom themes, intelligent prompts, search history, and other extension modules. I use the zsh + ohmyzsh + starship solution, as these configurations are common across various solutions, detailed in the following Alacritty configuration section.
Multi-Server Management#
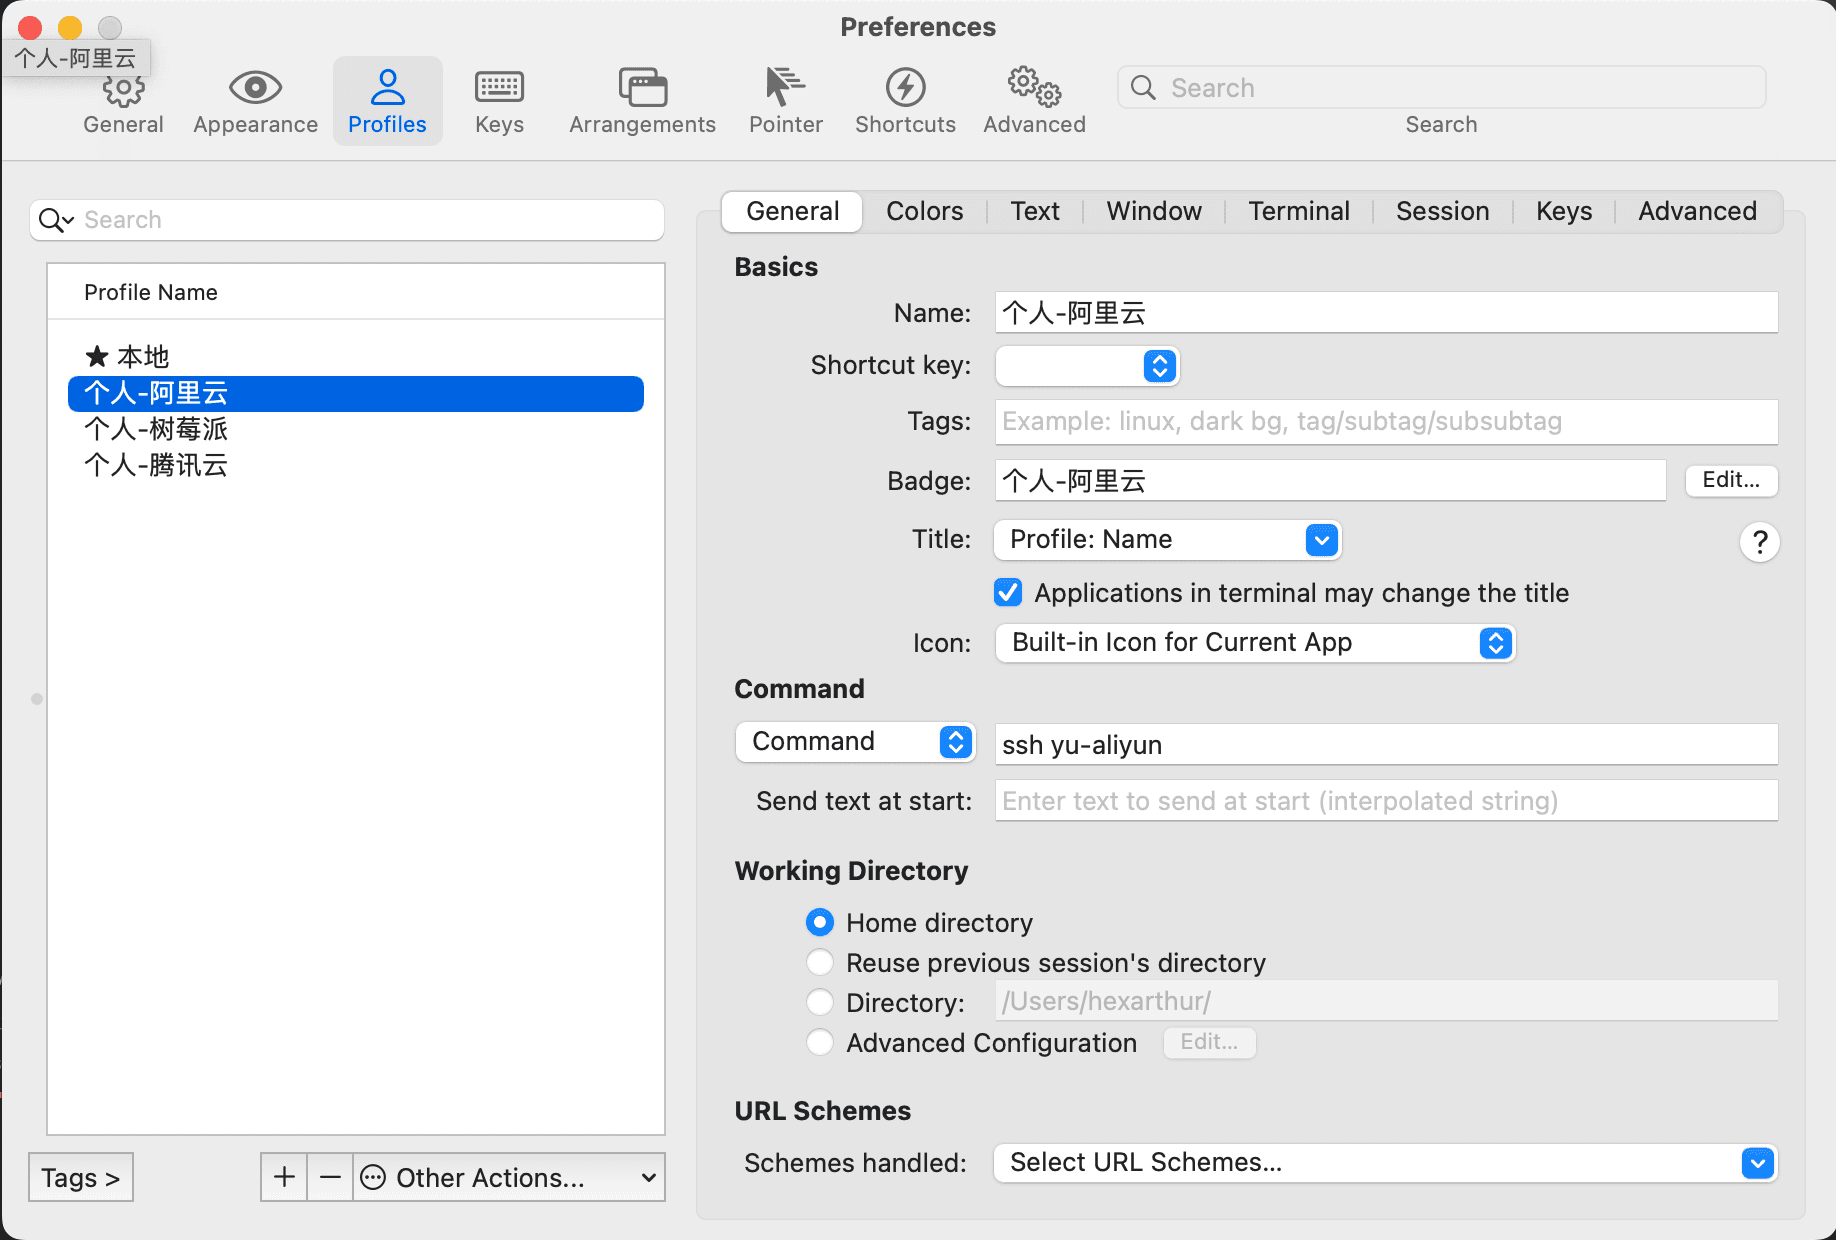
Currently, I mainly use iTerm2 to connect to my various remote hosts/servers. It provides convenient multi-configuration management features, allowing for quick switching between different servers or configuration environments by setting different Profiles, and can be identified with prominent Badges.
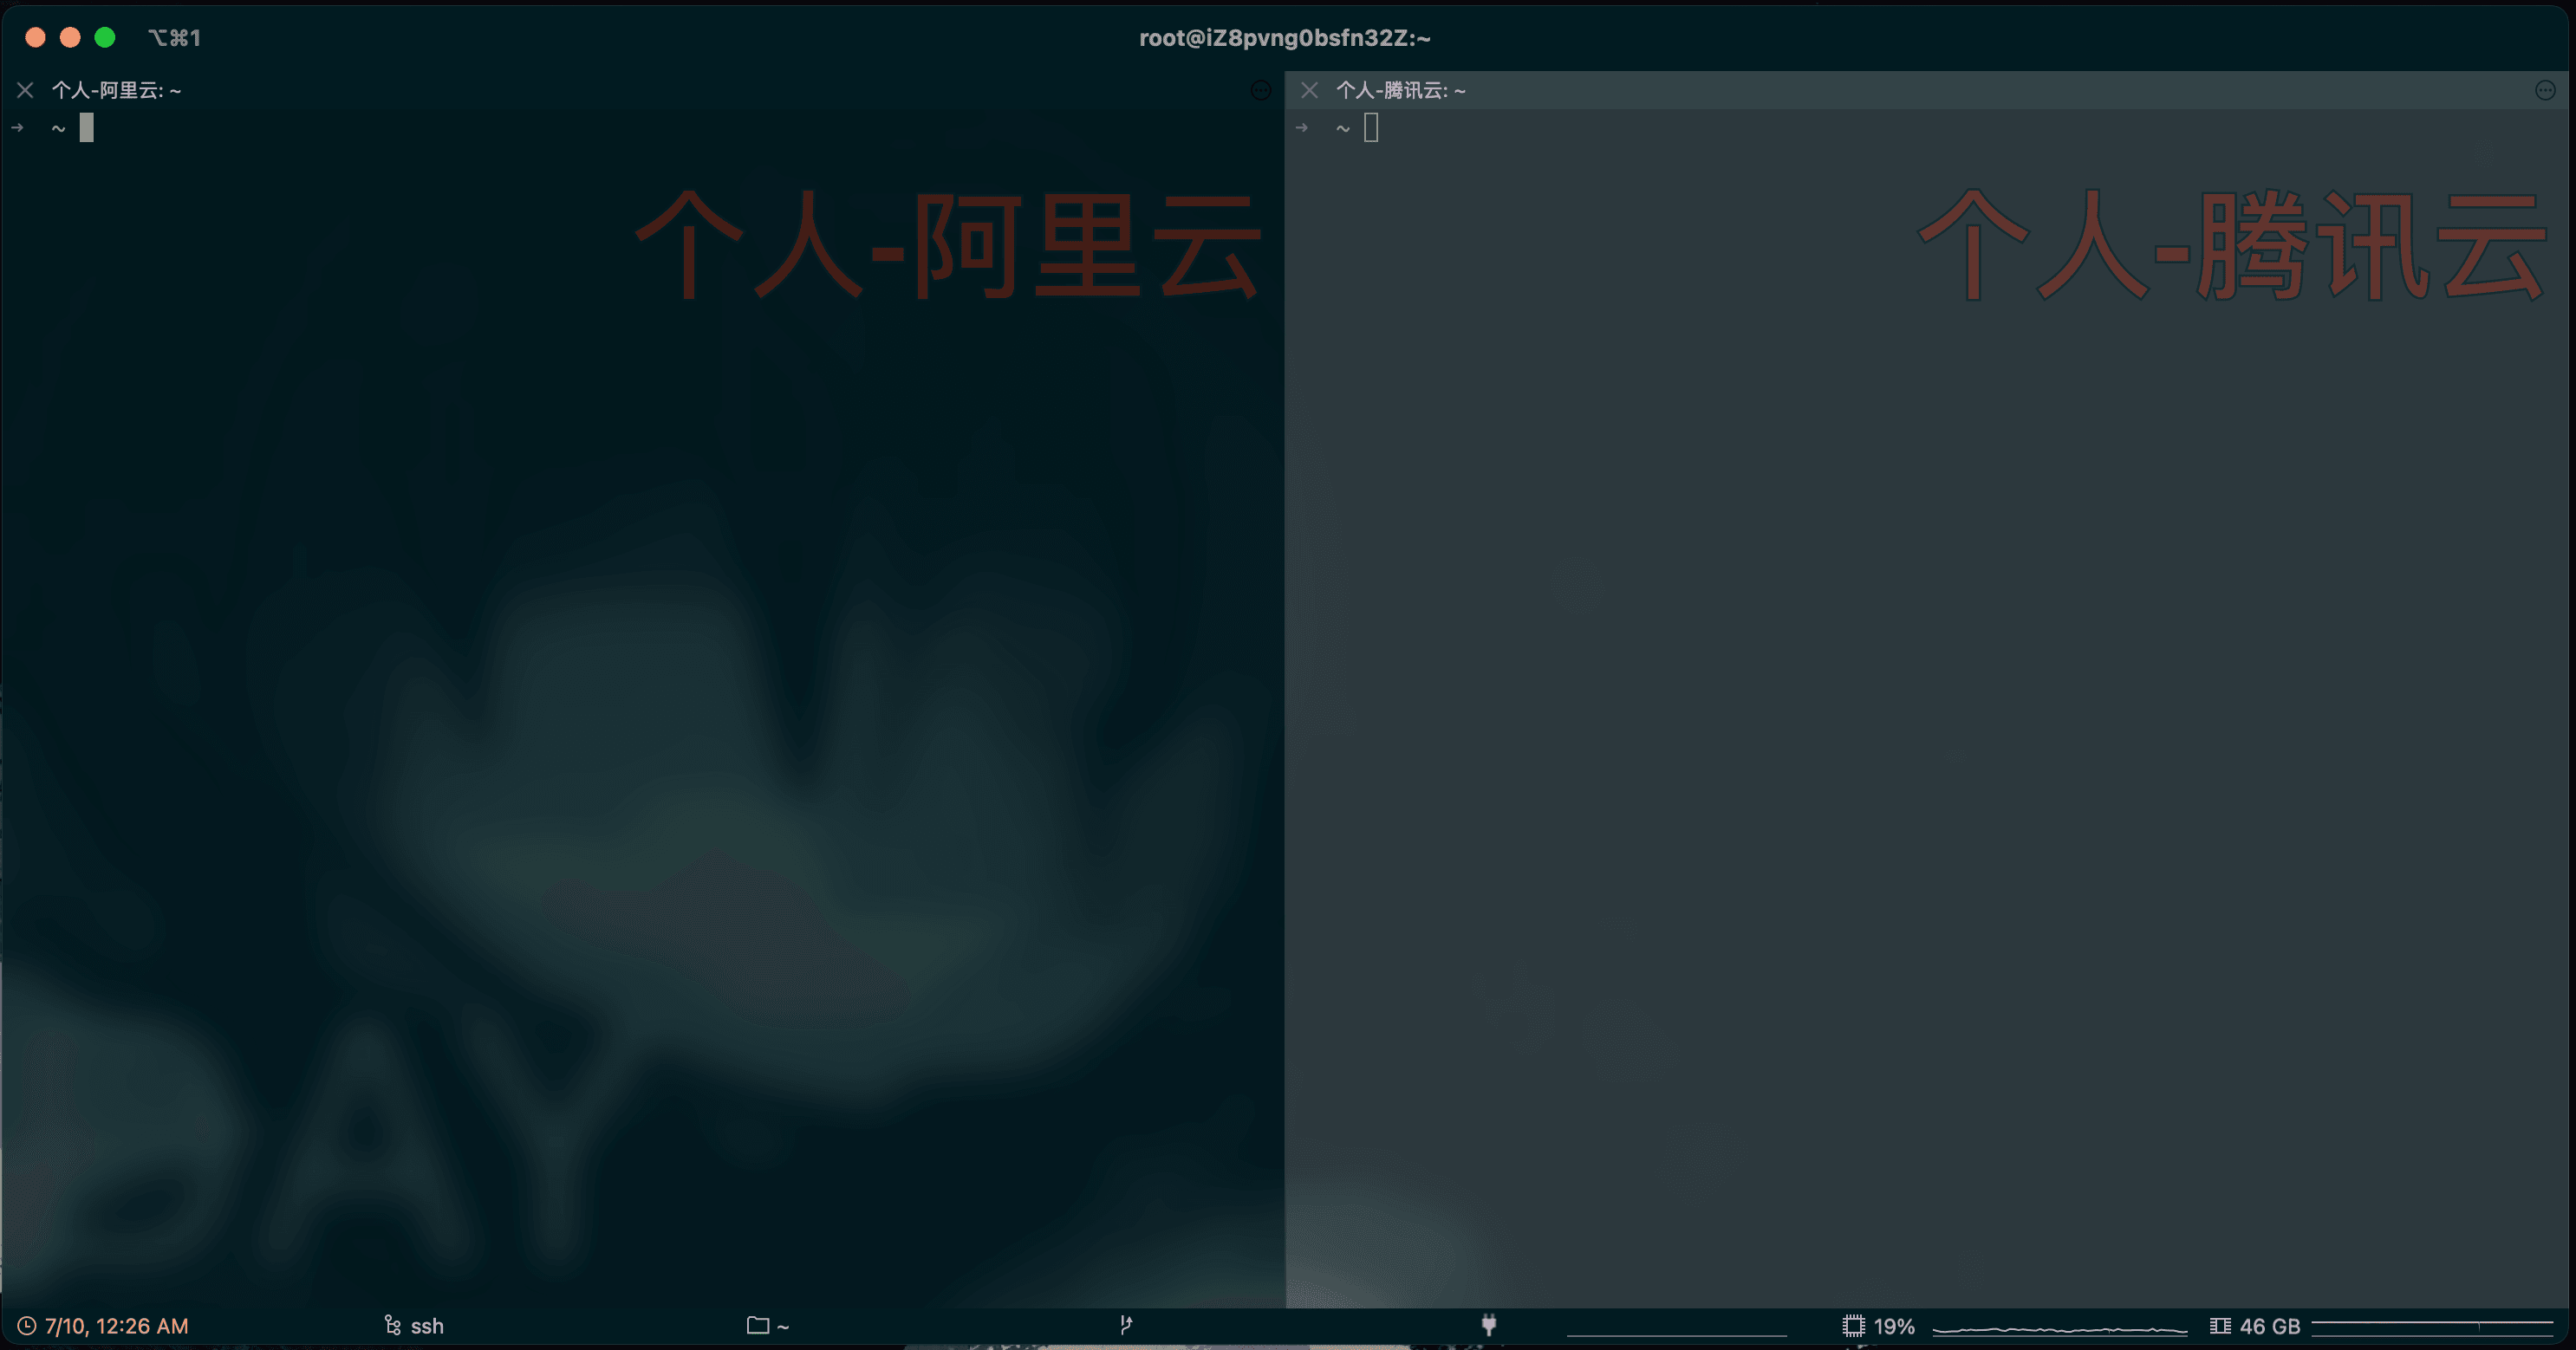
When we need to connect to multiple development machines in work or personal use, we can open the server by pressing Command+O or by right-clicking the iTerm2 icon in the Dock and selecting the corresponding Profile. We can also use the built-in shortcut keys Command+D and Command+Shift+D to horizontally or vertically split the terminal, facilitating simultaneous operations on multiple servers without constantly switching windows.
Alacritty#
iTerm2 is already a terminal tool with a very balanced aesthetic and functionality on the macOS platform, but overall, its response speed and configuration freedom are still not perfect. Therefore, I now mainly use it to connect to remote servers, while my local commonly used terminal has been replaced with Alacritty.
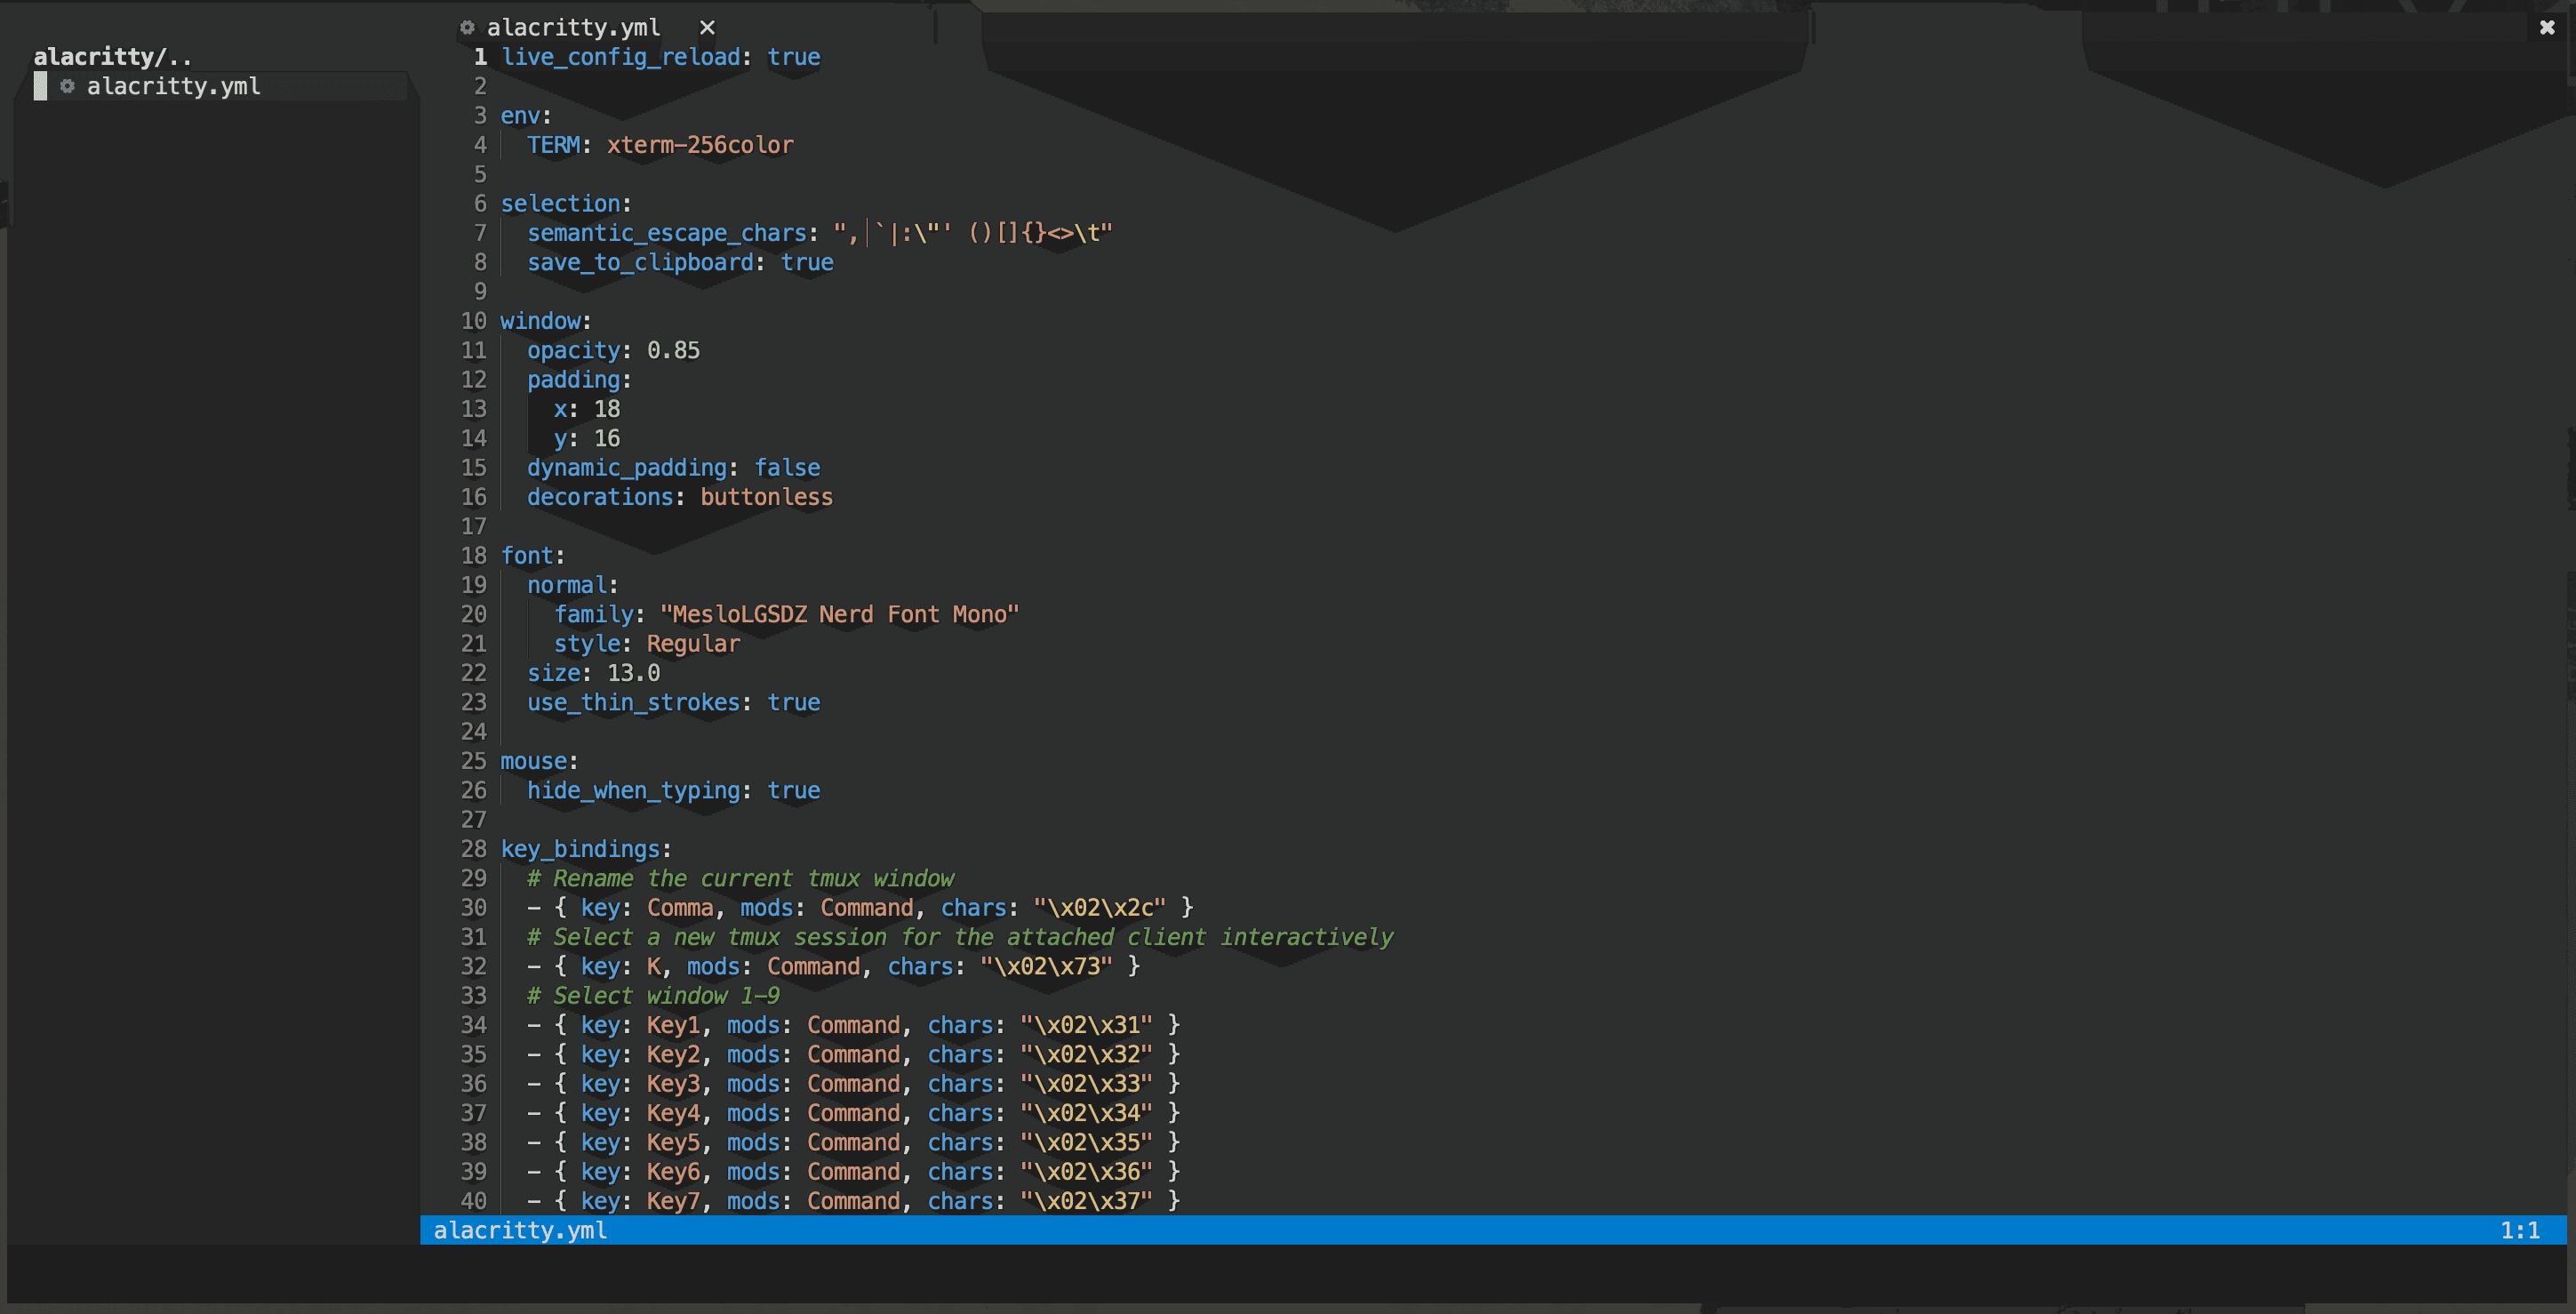
Alacritty is also a cross-platform terminal tool written in Rust, providing some basic default configurations, and various custom configurations can be made through the ~/.config/alacritty/alacritty.yml file. You can click here to access my complete configuration.
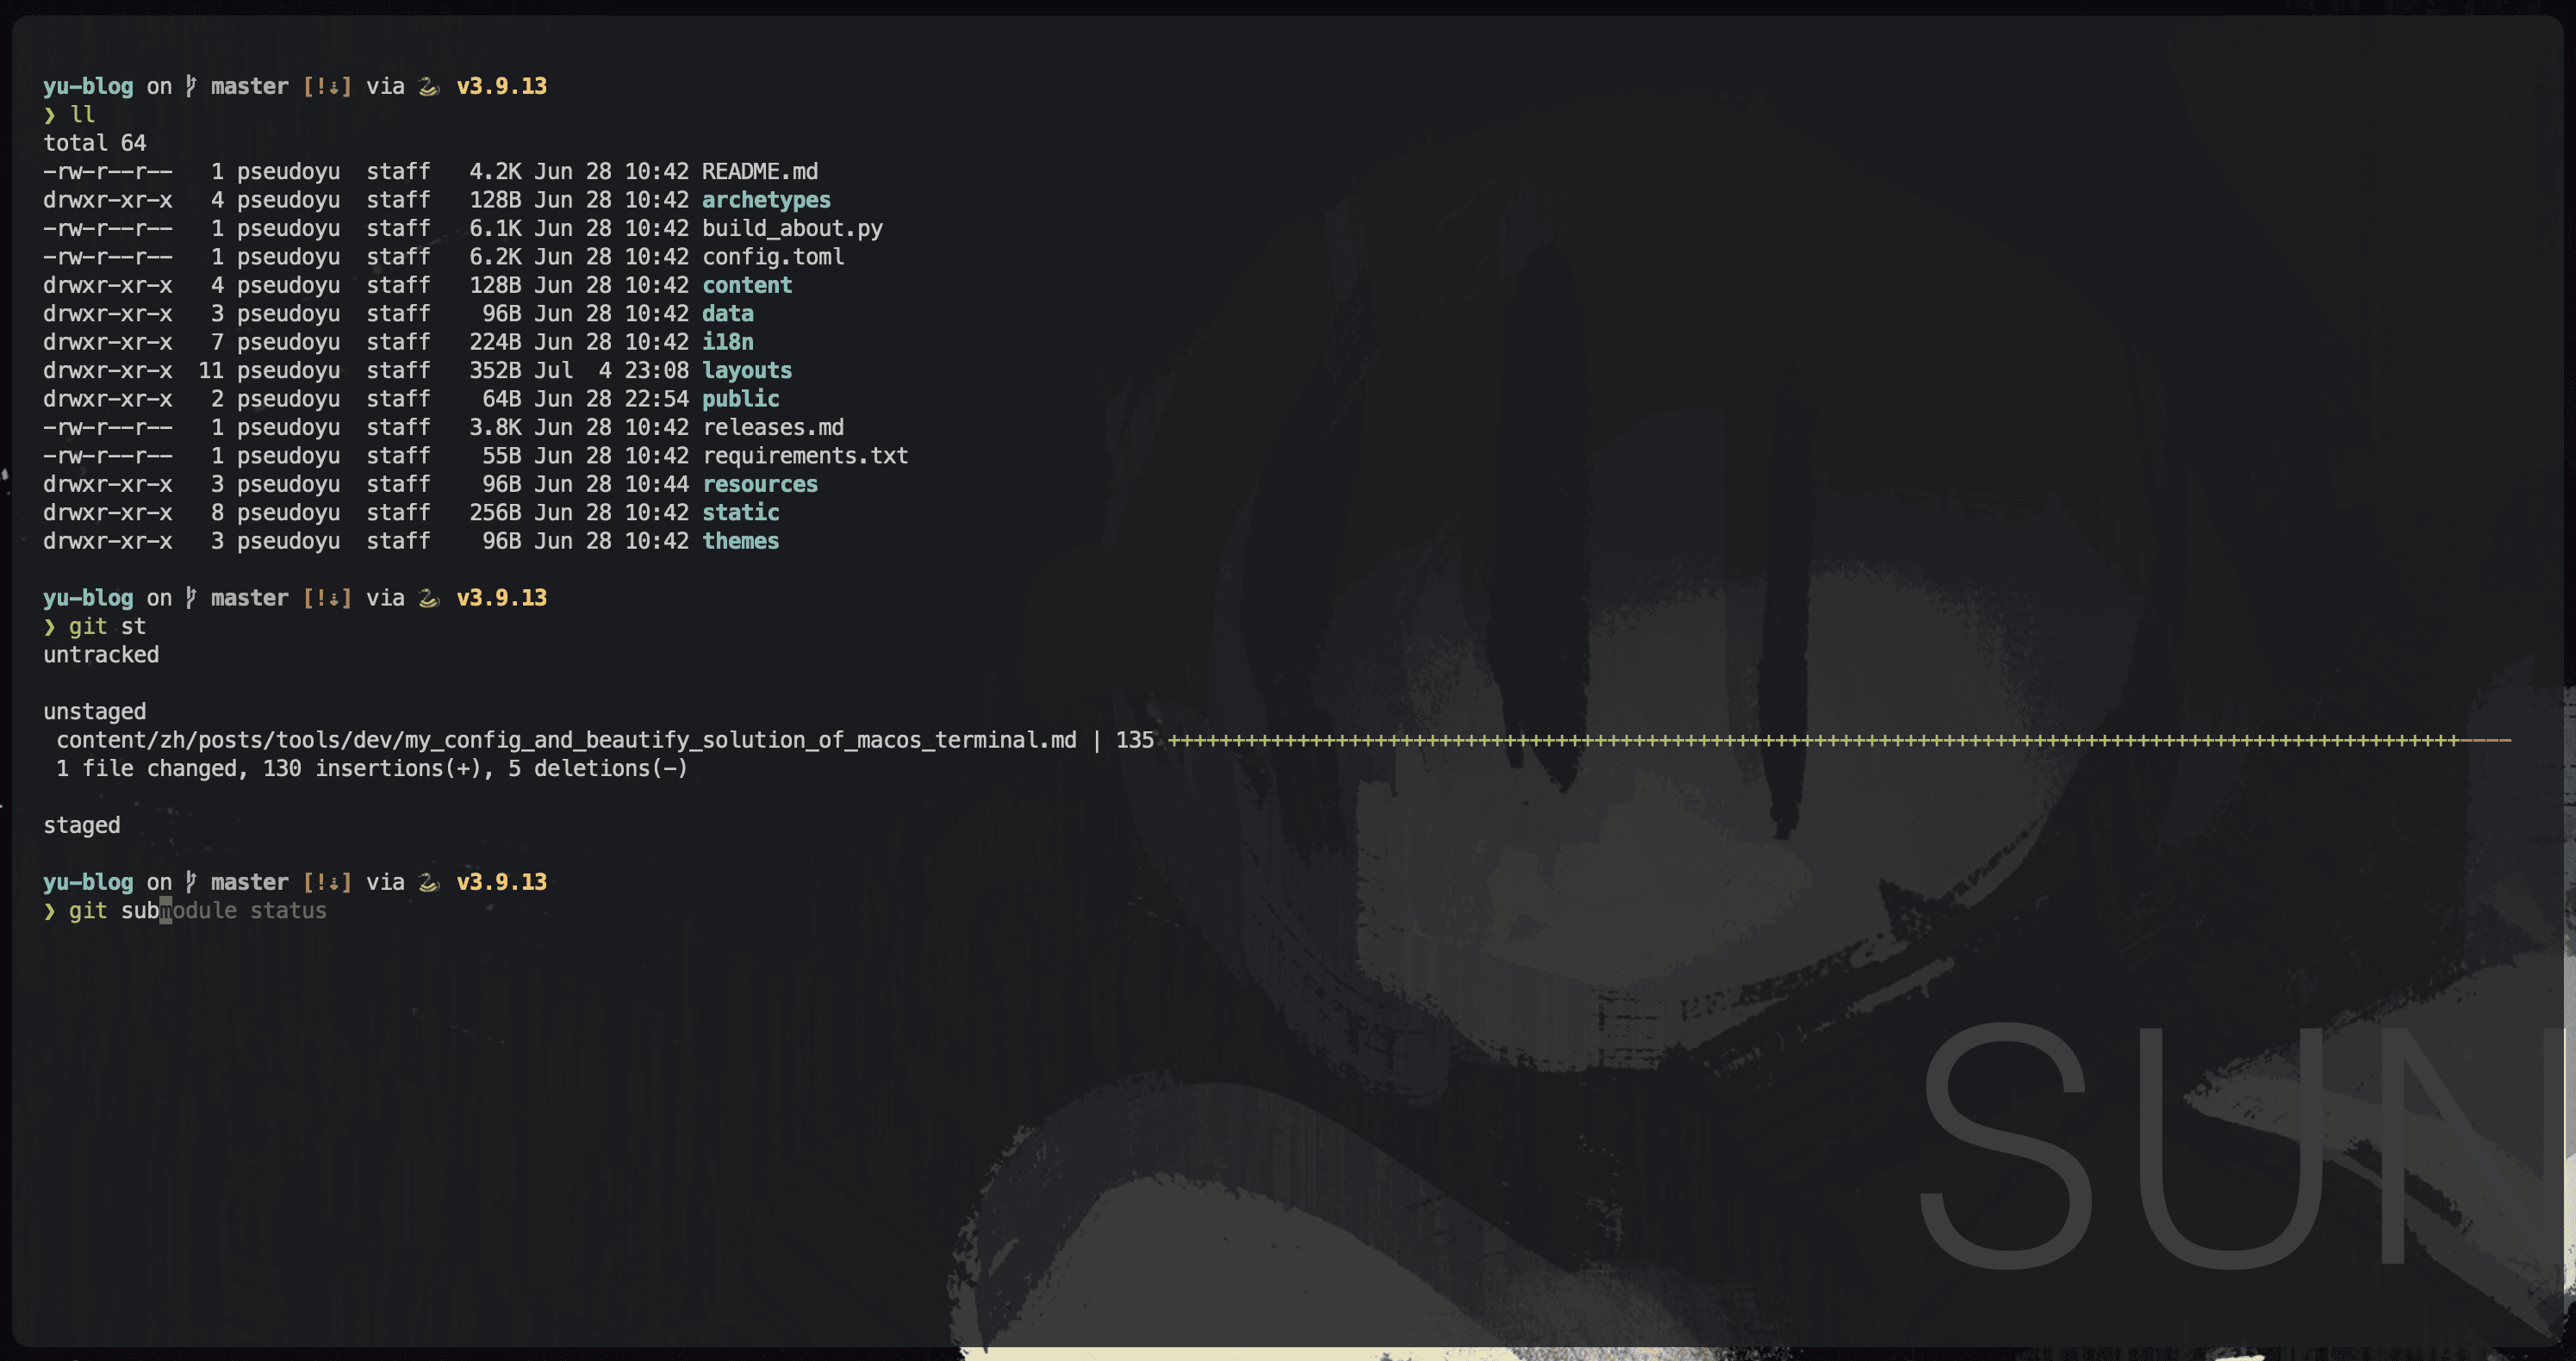
Appearance Configuration#
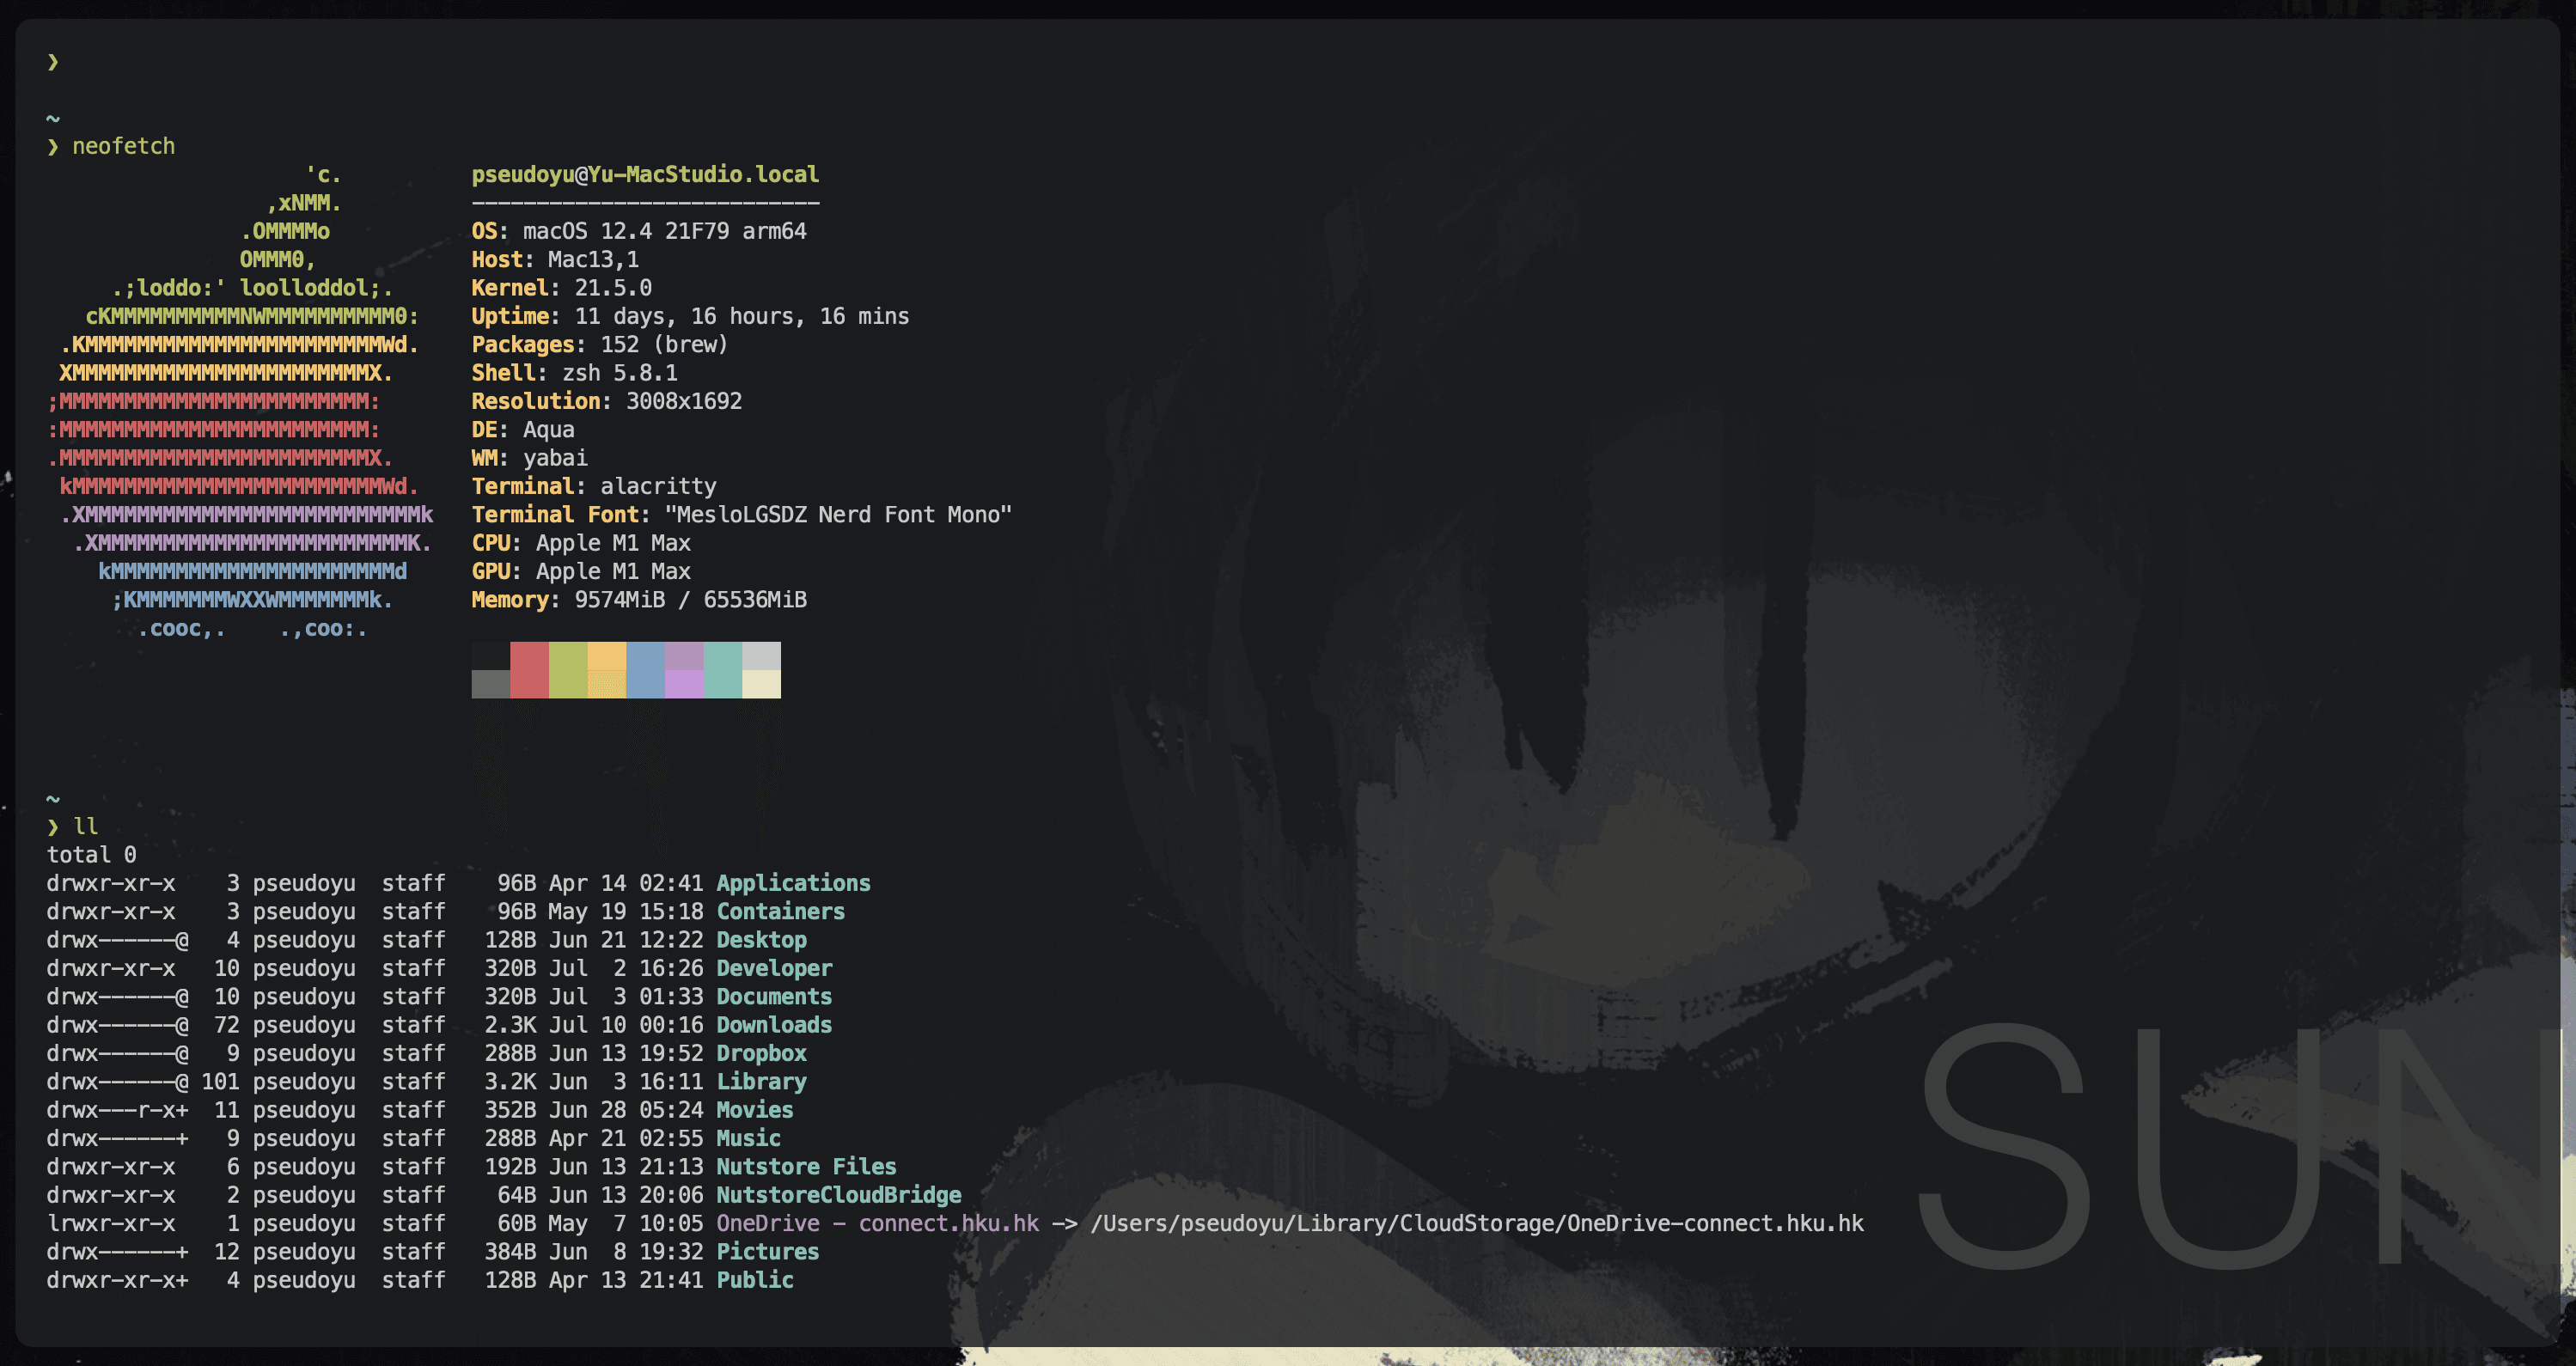
For the appearance, I mainly configured the window and font as follows to achieve a semi-transparent minimalist configuration, even without any borders or buttons. Other configurations can be viewed independently, such as "copy on select," which can be implemented through a few simple configuration items.
window:
  opacity: 0.85
  padding:
    x: 18
    y: 16
  dynamic_padding: false
  decorations: buttonless

font:
  normal:
    family: "MesloLGSDZ Nerd Font Mono"
    style: Regular
  size: 13.0
  use_thin_strokes: true
ohmyzsh + starship#
I use zsh as the default terminal and extend plugin functionality through ohmyzsh. zsh + ohmyzsh is currently a very popular Shell configuration solution, featuring a rich plugin system that allows for easy implementation of various extension functionalities with just a few lines of configuration. First, we install it according to its official instructions.
sh -c "$(curl -fsSL https://raw.github.com/ohmyzsh/ohmyzsh/master/tools/install.sh)"
After installation, enable ohmyzsh by adding the following configuration to ~/.zshrc:
export ZSH="$HOME/.oh-my-zsh"
source $ZSH/oh-my-zsh.sh
I configured starship to beautify the Shell prompt. Similarly, we follow the official instructions for installation:
curl -sS https://starship.rs/install.sh | sh
After completion, add the following configuration to ~/.zshrc:
eval "$(starship init zsh)"
Additionally, we can add plugin configurations in the plugin section of ~/.zshrc. For example, I configured the following plugins to support intelligent prompts, syntax highlighting, Ctrl + R command history search, and j + <path> for quick navigation.
plugins=(
  git
  zsh-autosuggestions
  zsh-syntax-highlighting
  zsh-history-substring-search
  autojump
  zsh-wakatime
  fzf-zsh-plugin
)
You can click here to view my complete configuration, with installation instructions for each plugin detailed in the official documentation.
tmux#

Since Alacritty itself does not provide window splitting, session management, and other features, we need to integrate the powerful cross-platform window management tool tmux.
macOS platform users can install it using brew install tmux, while users on other platforms can refer to the official instructions for installation.
It is configured through ~/.tmux.conf. Click here to view my configuration. Since its configuration requires some learning and memorization, this article will not elaborate on it; I recommend learning through the official documentation or other complete tutorials.
Neovim#
Our daily code writing generally occurs in VS Code or Jetbrains IDEs, while debugging requires using the terminal. If we want to avoid frequently switching between various software, we can choose vim, a command-line text editor.
However, native vim is a simple window that feels out of place with our configured terminal, so we will also beautify vim. Due to space limitations, this article will not cover the specific configuration and usage of vim, only describing my configuration scheme.

I use neovim, a derivative version of vim, which uses lua for configuration and plugin management in its higher versions. I use a scheme customized by a friend Cluas and made some modifications based on it. You can click here to view it. Just clone or download the nvim/ directory and copy it to ~/.config.
Its display effect is as follows:
Shortcut Key Configuration#
tmux is a powerful window management tool, but needing to use <Ctrl+b> + % or <Ctrl+b> + : for horizontal or vertical splitting, or <Ctrl+b> + c to create new windows is quite cumbersome.
So, is there a way to achieve splitting or creating new windows using macOS's built-in shortcuts like Command+D, Command+Shift+D, or Command+T?
After some research and tinkering, I perfectly implemented this requirement by referring to Josh Medeski's article 'macOS Keyboard Shortcuts for tmux'.
The basic implementation method is to enter the command xxd -psd in the terminal, then type the tmux shortcut key you want to map, such as <Ctrl+b> + c, which will display the hex codes for that input:
^Bc
02630a
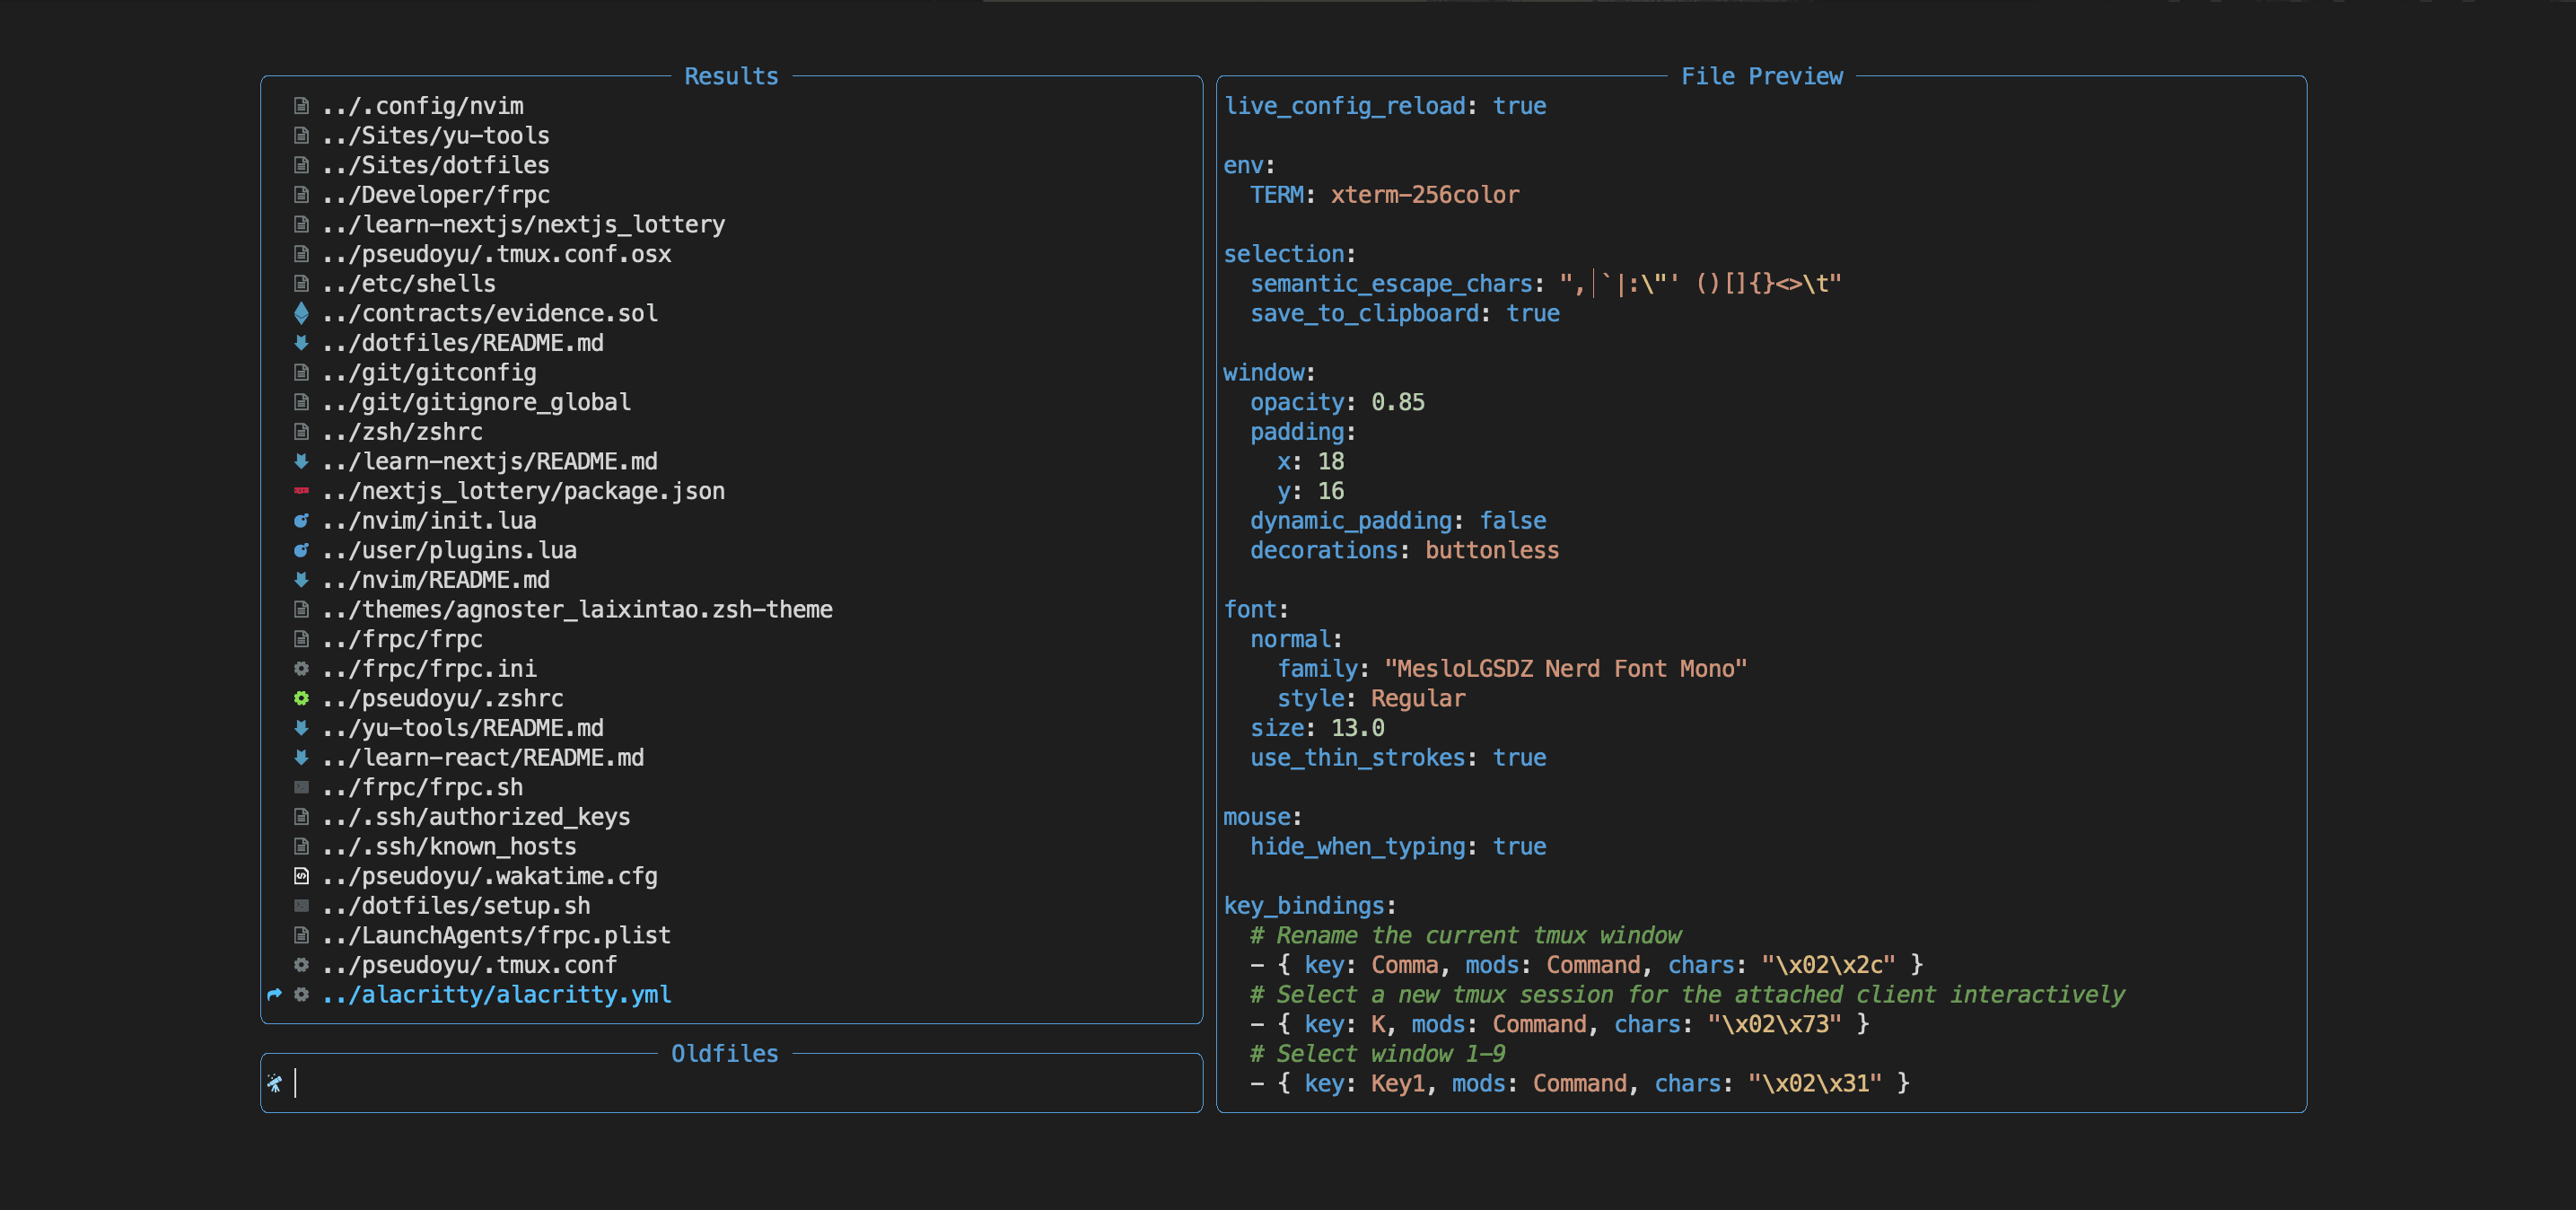
Here, 02 represents <Ctrl+b>, 63 represents c, and 0a represents the Enter key. Therefore, the shortcut key for creating a new window in tmux corresponds to the hex code \x02\x63. We can configure the following options in the key_bindings section of ~/.config/alacritty/alacritty.yml:
key_bindings:
  - { key: T, mods: Command, chars: "\x02\x63" }
Other shortcut key configurations follow the same principle. You can click here to view all my shortcut key configurations and modify them as needed.
Conclusion#
Thus, I have introduced and described the configurations of the three terminal tools I currently use. The ready-to-use Warp has its strengths, iTerm2 achieves a good balance between usability and customization, and Alacritty has its own joys of tinkering.
As I mentioned earlier, sometimes switching to a different terminal can bring a whole new mood. Continuously optimizing and tinkering during leisure time can also be a form of relaxation. Of course, everyone's terminal configuration has its own preferences and characteristics; this article only introduces my scheme, which primarily meets my aesthetic pursuits and functional needs. I hope it can provide a reference for your terminal configuration. If you encounter issues during configuration or have better optimization suggestions, feel free to communicate.