Introduction#
In the previous project 'GitHub - Personal Toolbox', I mentioned that I have a Mac Studio that runs continuously and a Raspberry Pi 3b+ device with Ubuntu installed. When I am at home, I usually operate the Mac Studio connected to a monitor or access it via SSH through a Chromebook terminal.
After finishing remote work, I need to commute daily between the company and home. Since I didn't want to carry a laptop every day, I left my 16-inch MacBook Pro (which is really heavy) at the company for work project development. Although I can sync code through GitHub and GitLab, and files through OneDrive and iCloud, I still feel like I am maintaining two desktop development environments, and some configuration changes require double the workload, which brings a significant mental burden.
Moreover, the performance of my M1 Max chip machine at home is far better than that of the old Intel MacBook Pro, so I started to think about a solution for remote access to home devices over the public network and practiced a thin client workflow. This article is a record and summary of this workflow.
Thin Client Workflow#
I learned about the thin client development model for the first time from the 'Teahour' Podcast episode '#95 - What is the experience of developing with a Chromebook?'.
Basic Concept#
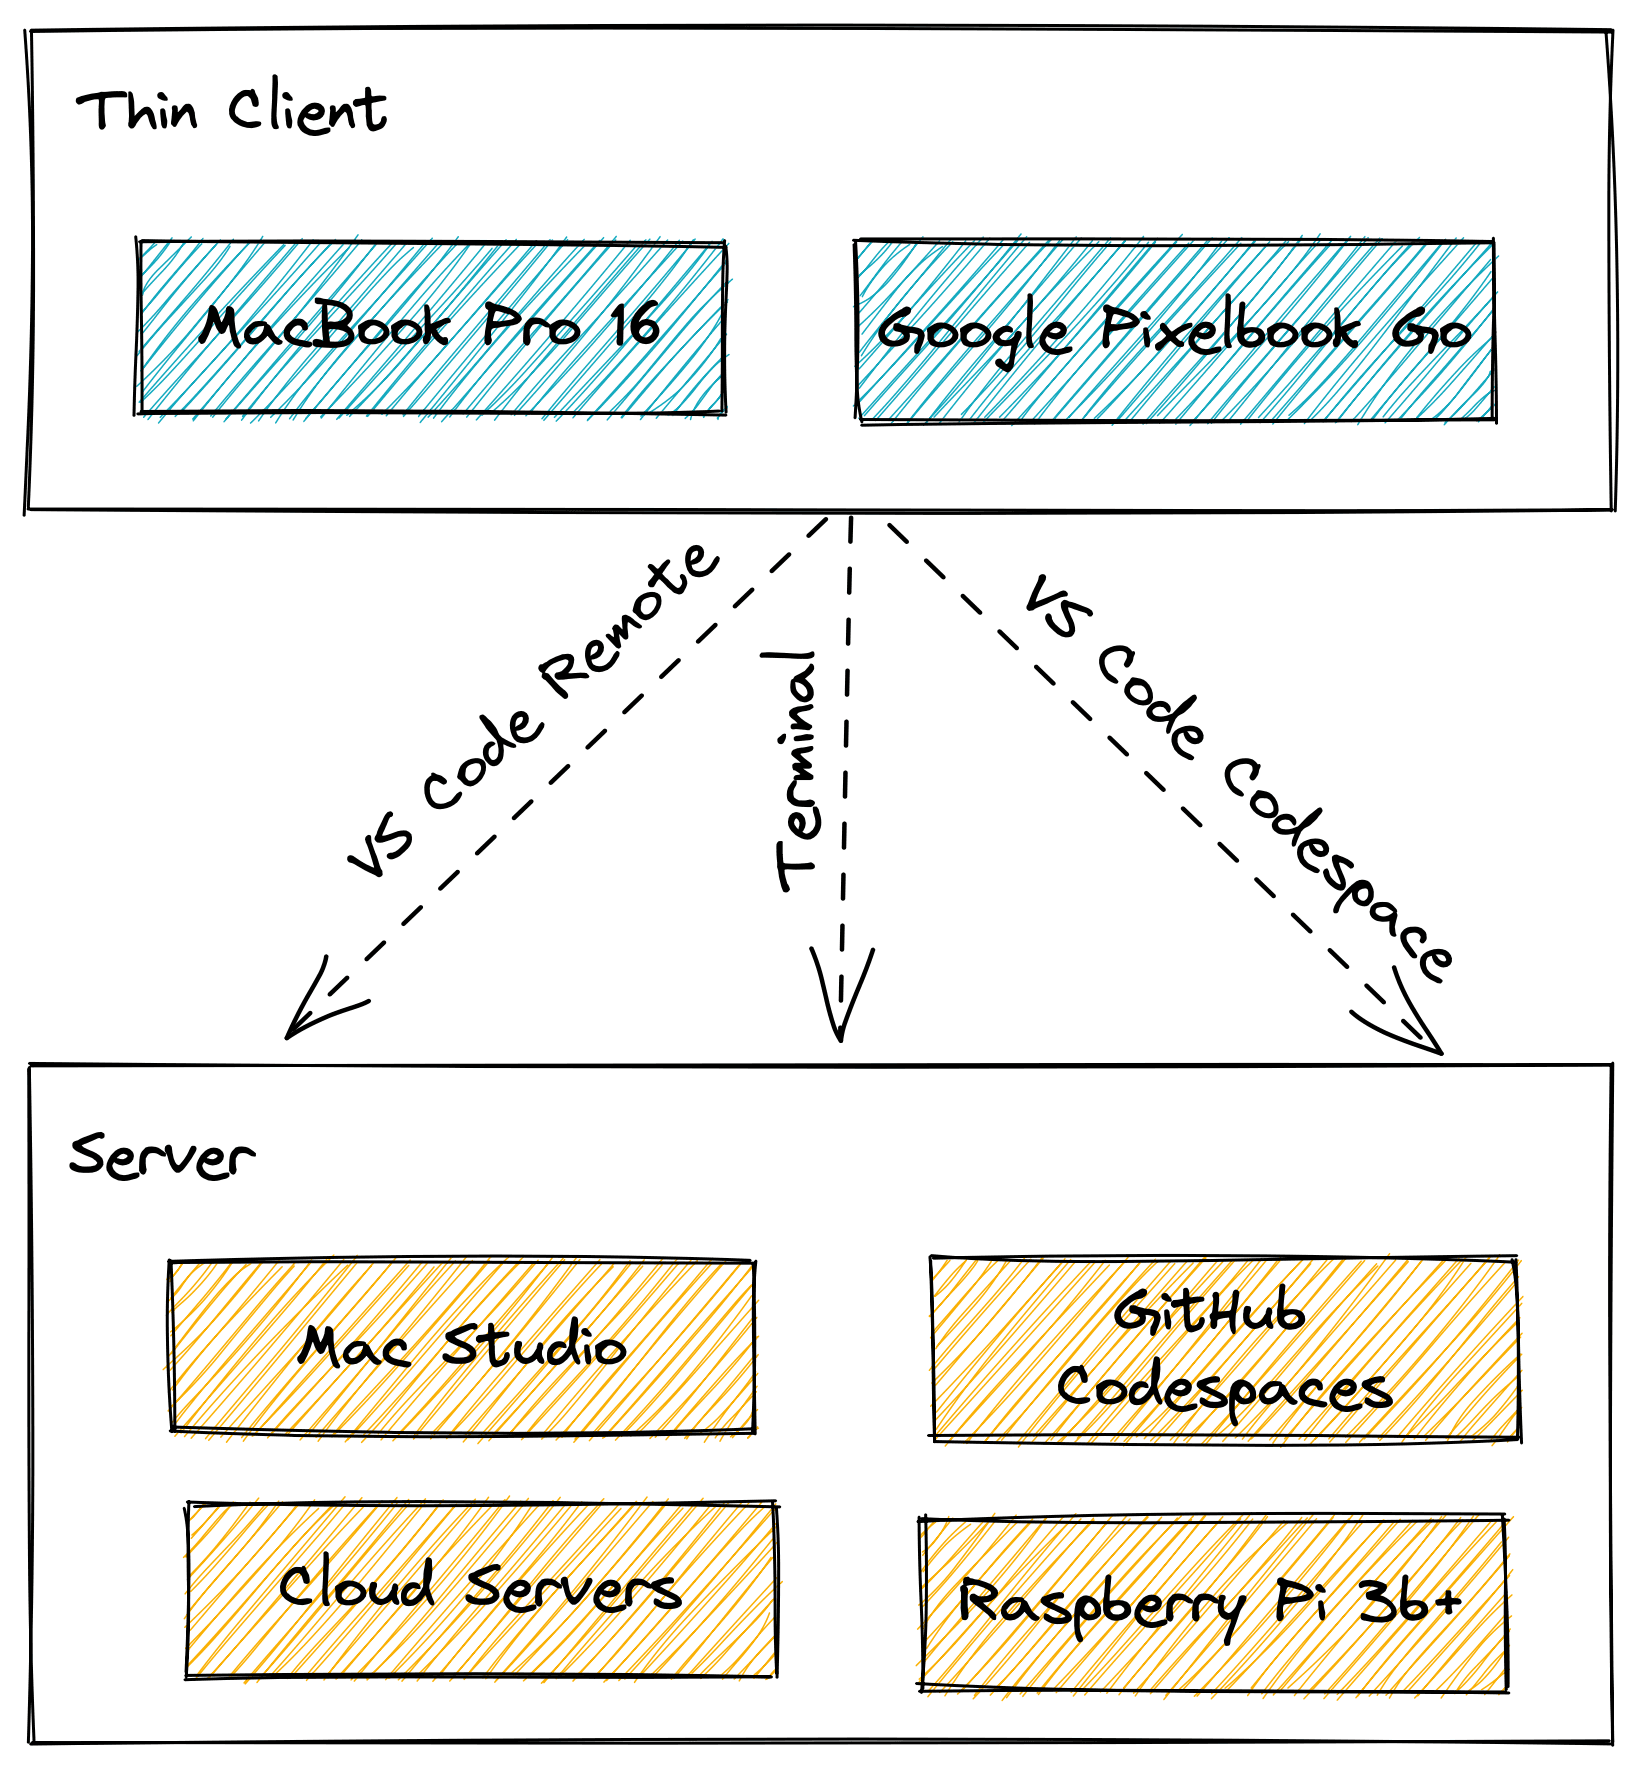
Thin client development is an increasingly popular development model. Its main idea is that the development input devices (such as laptops, tablets, etc.) do not install various development environments but connect to their remote hosts or servers through client programs like terminal, VS Code Remote, or Jetbrains Client. This approach has the following benefits:
- It can greatly simplify the development environment; you only need a terminal and a browser to complete most development work, reducing device costs, and you can even use a Chromebook or iPad for daily development tasks.
- It reduces the limitations of the workplace, allowing you to use portable devices freely in cafes or other locations. Compared to running various development environments locally, this method also offers longer battery life.
- Regardless of which device you use for development, you can ensure that your development environment and progress remain consistent, reducing the costs of environment synchronization and maintenance.
- Often, our development environments are macOS or Windows operating systems, and sometimes the local development environment may differ from the actual project runtime environment. Remote development on Linux can effectively reduce this difference and improve development efficiency.
- We can concentrate most of the costs on a single, more powerful device to meet long-term development needs.
- When there are temporary development needs, we can easily start and stop cloud servers, saving costs and improving development efficiency.
- Fields like Deep Learning require specific devices like GPUs for computation, which cannot be developed on local machines.
My Thin Client Workflow#
To reduce costs, my thin client workflow is primarily based on a set of intranet penetration solutions that I built myself (the principles and setup methods will be detailed later). It allows various clients to access the more powerful host and server at home from the public network to complete the main development work.
My main client devices currently are:
- 16-inch MacBook Pro, which is kept at the company for work, mainly used for browsing the web, documents, and connecting to various remote hosts or servers for development work via the iTerm2 terminal tool, and managing code and projects through Git.
- Google Pixelbook Go, mainly used for technical learning, blog writing, or personal project development in cafes, on the sofa at home, or other places.
My server side consists of the following categories:
- Mac Studio host, connected to power and running continuously, is my main server, providing access for clients from the public network through intranet penetration. When working or studying at home, it can also connect to a monitor and keyboard/mouse to act as a client connecting to other server hosts.
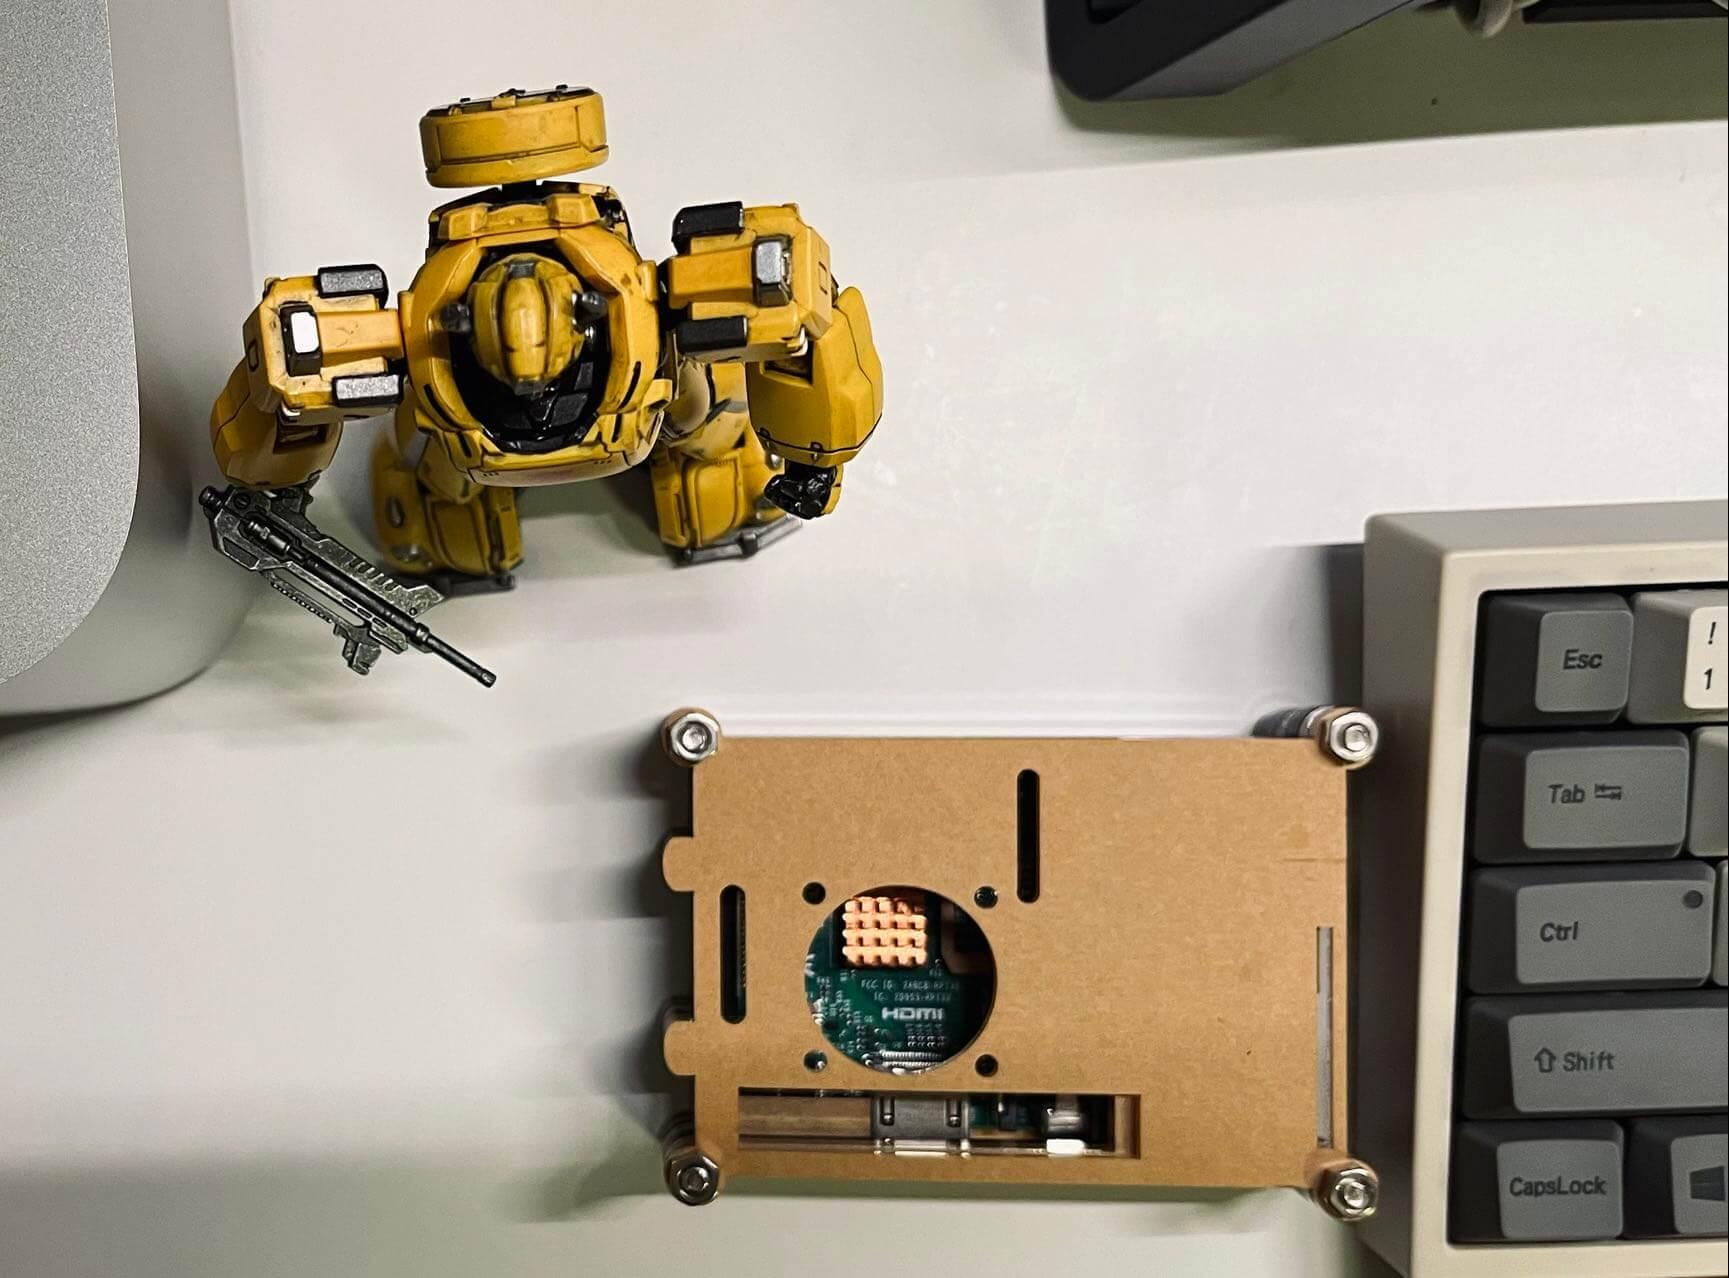
- Raspberry Pi, running Ubuntu as the main service and debugging environment, mainly running some services and providing access for clients from the public network through intranet penetration.
- Personal Alibaba Cloud ECS, Tencent Cloud lightweight servers, or other project development environments provided by companies, mainly used for running and debugging some project services, such as chain environments.
- GitHub Codespaces, which I participated in the beta test, provides up to 10 project runtime environments for personal projects. I mainly use it for developing Solidity, Rust, or frontend learning projects, ensuring a consistent environment across different machines or even browsers without needing to reconfigure. However, for security reasons, I do not run work projects or projects involving personal sensitive information.
My Experience with Thin Client Development#
Thin client development is not just an optimization of tools and techniques; its original intention is a form of "minimalism" in work mode. After practicing this development model for several months, I can clearly feel that the time spent on debugging and maintaining the development environment has decreased, allowing me to focus more on the code and services themselves. The seamless switching between "ready to use" and "start and stop" modes enables me to switch work states and projects at any time, significantly reducing the time costs of environment cold starts and configurations.
Although I have my own pursuit of user experience in software and hardware, I am not someone who seeks perfection in every aspect. Instead, I follow a "Just Enough" philosophy, meeting my current usage needs. For example, regarding the network environment, I have a regular 100M broadband network at home and have not deliberately tinkered with the bandwidth or router. Overall, whether typing or obtaining real-time displays, the network latency during operations is almost negligible (my main usage scenario is using VS Code Remote or iTerm2 terminal tools on macOS to connect to remote hosts or servers via SSH for development, and occasionally using Termius's SFTP function for file transfers, for reference), and there are almost no disconnections due to the network environment.
I only used VNC for remote desktop control when configuring the Raspberry Pi and did not perform other operations that heavily rely on graphical interfaces. The network latency is acceptable, but I wouldn't recommend it.
Analysis of Remote Access Needs#
Regarding remote network access solutions and principles, the article 'Remote LAN Access Guide' from 少数派 has detailed descriptions and evaluations of various solutions. I only considered the usability and cost of the solutions based on my personal needs, and everyone can read it to choose a suitable solution.
First, I organized the network conditions and needs.
Network Conditions:
- Short-term broadband that can be applied for casually, without providing a public IP, and applying for one seems troublesome.
- The home wireless router seems to be an ordinary Xiaomi one, and I haven't tinkered with it much.
- Due to work and personal development needs, I have long-term servers in Alibaba Cloud and Tencent Cloud, which have public IPs.
Remote Connection Needs:
- Access the Mac Studio host via public SSH and be able to open specific ports when needed.
- Access the Raspberry Pi via public SSH and be able to open specific ports when needed.
- Require stable and fast connections, and reuse existing software and services as much as possible to avoid additional expenses.
- Easy to expand new devices (such as purchasing a new Raspberry Pi) and configure new port mappings (open new services).
- Since the home network is entirely managed by Surge as a soft router, with DHCP and other configurations turned off, I prefer not to configure at the optical modem and router level.
- Able to monitor the connection status of the home network environment and the resource status of the Raspberry Pi server in real-time.
frp Intranet Penetration Solution#
After some research, I chose the open-source project 'GitHub - fatedier/frp'. According to its official documentation:
frp is a high-performance reverse proxy application focused on intranet penetration, supporting multiple protocols such as TCP, UDP, HTTP, and HTTPS. It can expose intranet services to the public network in a secure and convenient way through a relay node with a public IP. By deploying the frp server on a node with a public IP, intranet services can be easily penetrated to the public network while providing many professional features.
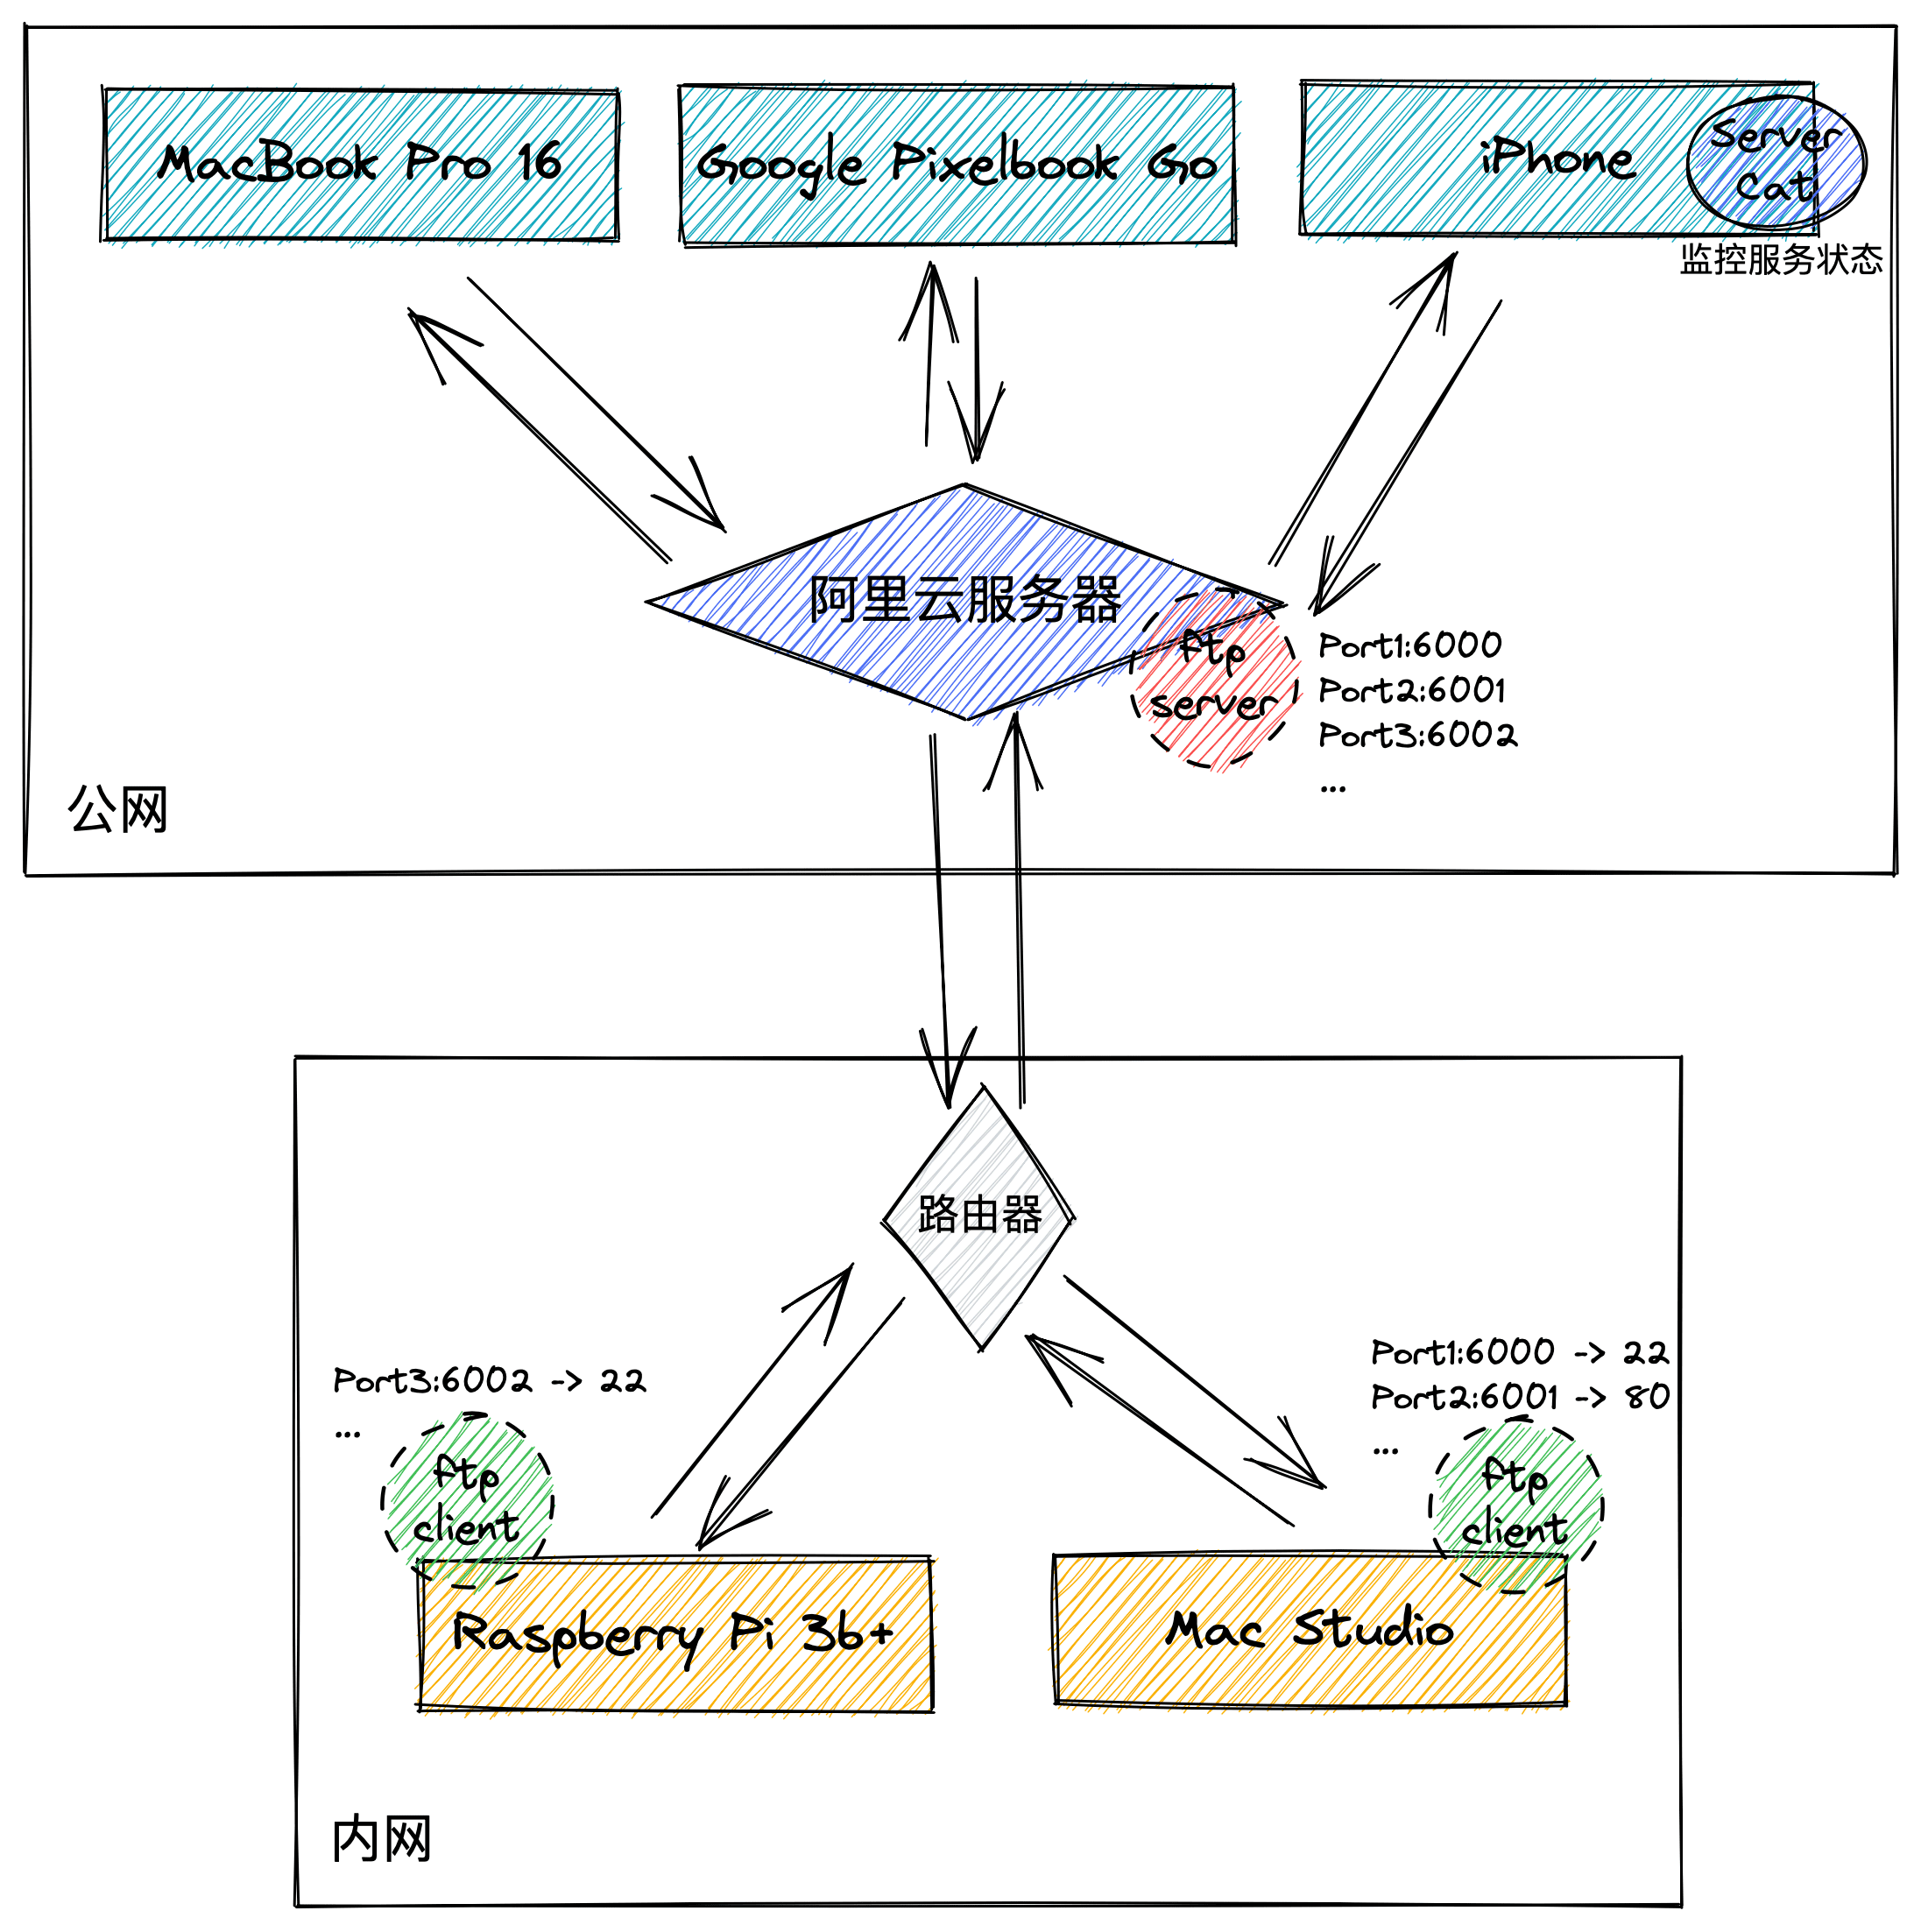
This perfectly meets my needs. I only need to reuse my purchased Alibaba Cloud server with a public IP as a relay server, deploy the frp server, expose the corresponding ports, and deploy the frp client on the home devices that need to be accessed from the public network and perform port mapping to achieve intranet penetration.
Solution Architecture#
First, I deployed the frp server on my server with a public IP and exposed the corresponding ports.
In my home intranet environment, there are mainly two devices that are always connected to power: a Mac Studio host and a Raspberry Pi server running Ubuntu. They are mainly connected to the wireless router via Ethernet/WiFi. I installed and ran the frp client on both machines according to the official instructions, connecting to the frp server and mapping the service ports that need to be opened (for example, mapping the Raspberry Pi's SSH service port 22 to the Alibaba Cloud server's 6002). It is worth mentioning that since the frp client actively sends requests to the server, there is no need to reconfigure even if the network environment changes; you only need to ensure that its network environment can access the relay server where the frp server is installed.
At this point, my Alibaba Cloud relay server can expose our intranet environment and services to the public network. When I am at the company, I can access it using my laptop, tablet, or phone through the Alibaba Cloud server's public IP and the corresponding service port, such as remotely connecting to the Mac Studio via SSH for development work.
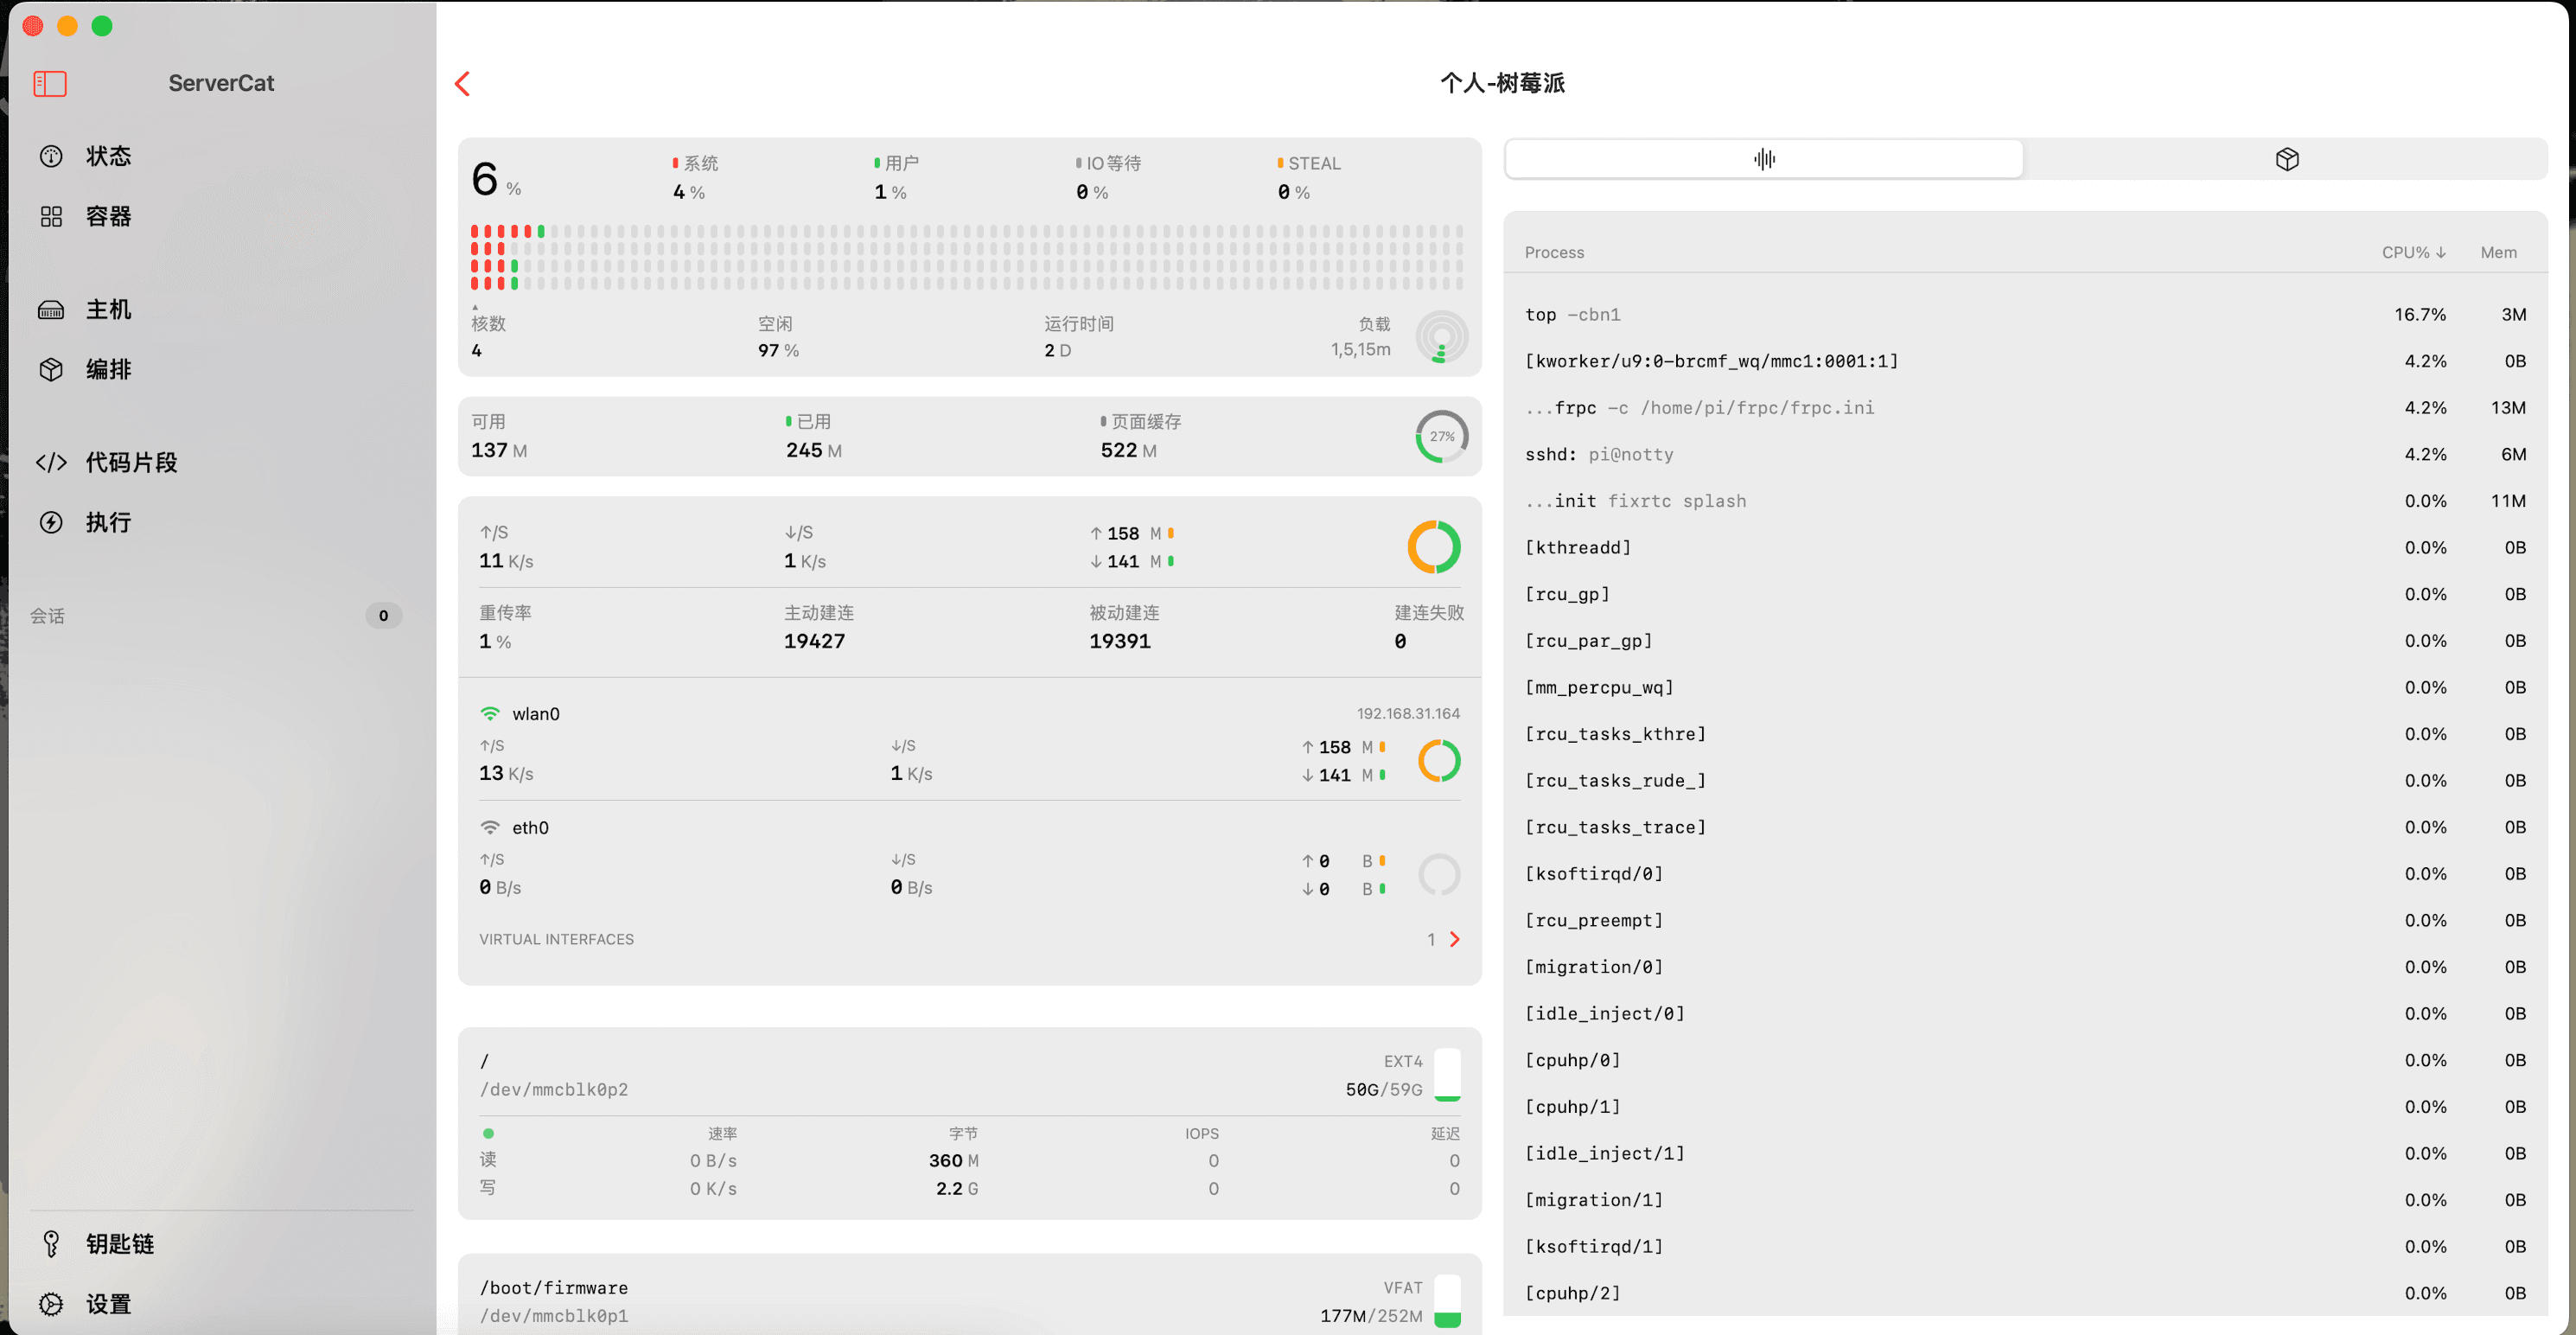
At the same time, we want to monitor the home network environment and the status of the two hosts in real-time for maintenance. I used Surge on macOS as a soft router to manage the network of all devices at home and utilized the cloud notification feature of Surge on iOS to monitor the home network status in real-time. Additionally, I used ServerCat software to monitor the resources of the Raspberry Pi server at home, even being able to track temperature, making the experience similar to that of a cloud server.
The configuration of frp is relatively simple; just follow the official documentation. My configuration process is as follows.
frp Server Configuration#
My Alibaba Cloud server runs CentOS, but other Linux distributions are similar.
Service Installation and Configuration#
First, log in to the Alibaba Cloud server terminal and install the frp program using the following command (note that you need to download the version corresponding to your operating system from the 'GitHub - fatedier/frp' project releases page, extract it, and enter the directory).
wget https://github.com/fatedier/frp/releases/download/v0.43.0/frp_0.43.0_linux_amd64.tar.gz
tar -zxvf frp_0.43.0_linux_amd64.tar.gz
cd frp_0.43.0_linux_amd64/
The frps
and frps.ini
files are what we need to focus on. frps
is the server program, while frps.ini
is the corresponding configuration file. We edit the configuration file using vi frps.ini
:
[common]
bind_port = 7000
dashboard_port = 7002
token = password
dashboard_user = admin
dashboard_pwd = 123456
vhost_http_port = 8080
Since I want to visualize the running status of our frp service through the console, I also configured the dashboard-related parameters, which can be selected according to your needs. Save or remember this configuration, as it will need to correspond when using the frp client to connect to the server. After saving the configuration, you can start the server with ./frps -c frps.ini
.
Of course, we need to configure it to start automatically and run in the background to avoid reconfiguration every time the server restarts.
vi /lib/systemd/system/frps.service
Add the following content and save it, making sure to change the paths of frps
and frps.ini
to your actual paths.
[Unit]
Description=frps service
After=network.target syslog.target
Wants=network.target
[Service]
Type=simple
ExecStart=/path/to/frps -c /path/to/frps.ini
[Install]
WantedBy=multi-user.target
Service Start and Boot Auto-Start Configuration#
After completing the configuration, you can start the server with systemctl start frps
.
We enter the following command in the command line to configure the service to start automatically on boot:
systemctl enable frps
At this point, our server configuration is complete.
frp Client Configuration#
Service Installation and Configuration#
The frp client configuration is similar to the server configuration. Download the corresponding version of the frp program using the wget
command, extract it, and enter the directory.
wget https://github.com/fatedier/frp/releases/download/v0.43.0/frp_0.43.0_linux_amd64.tar.gz
tar -zxvf frp_0.43.0_linux_amd64.tar.gz
cd frp_0.43.0_linux_amd64/
The frpc
and frpc.ini
files are what we need to focus on. frpc
is the client program, while frpc.ini
is the corresponding configuration file. We edit the configuration file using vi frpc.ini
:
[common]
server_addr = 114.114.114.114
server_port = 7000
token = password
[pi]
type = tcp
local_ip = 127.0.0.1
local_port = 22
remote_port = 6001
Here, server_addr
and server_port
need to be filled with the actual public IP and port of the relay server, and token
should be filled with the previously configured token. The following is the port mapping configuration for the services you need to connect to; local_ip
and local_port
should be filled with the local IP and port of the client. For example, if you need to enable the SSH service, it would be 127.0.0.1
and 22
, while the last remote_port
would be the port mapping for that port on the relay server.
Service Start and Boot Auto-Start Configuration#
Ubuntu#
In the Raspberry Pi's Ubuntu system, we create or edit the frpc service configuration file by using vi /etc/systemd/system/frpc.service
, adding the following content and saving it. Similarly, change frpc
and frpc.ini
to your actual paths.
[Unit]
Description=frpc daemon
After=syslog.target network.target
Wants=network.target
[Service]
Type=simple
ExecStart=/path/to/frpc -c /path/to/frpc.ini
Restart= always
RestartSec=1min
ExecStop=/usr/bin/killall frpc
[Install]
WantedBy=multi-user.target
After completing the configuration, enable the service to start automatically with sudo systemctl enable frpc.service
and start the client service with sudo systemctl start frpc.service
.
macOS#
In the macOS system, we edit the plist to add service auto-start using vi ~/Library/LaunchAgents/frpc.plist
, similarly changing frpc
and frpc.ini
to your actual paths.
<?xml version="1.0" encoding="UTF-8"?>
<!DOCTYPE plist PUBLIC -//Apple Computer//DTD PLIST 1.0//EN
http://www.apple.com/DTDs/PropertyList-1.0.dtd >
<plist version="1.0">
<dict>
<key>Label</key>
<string>frpc</string>
<key>ProgramArguments</key>
<array>
<string>/path/to/frpc</string>
<string>-c</string>
<string>/path/to/frpc.ini</string>
</array>
<key>KeepAlive</key>
<true/>
<key>RunAtLoad</key>
<true/>
</dict>
</plist>
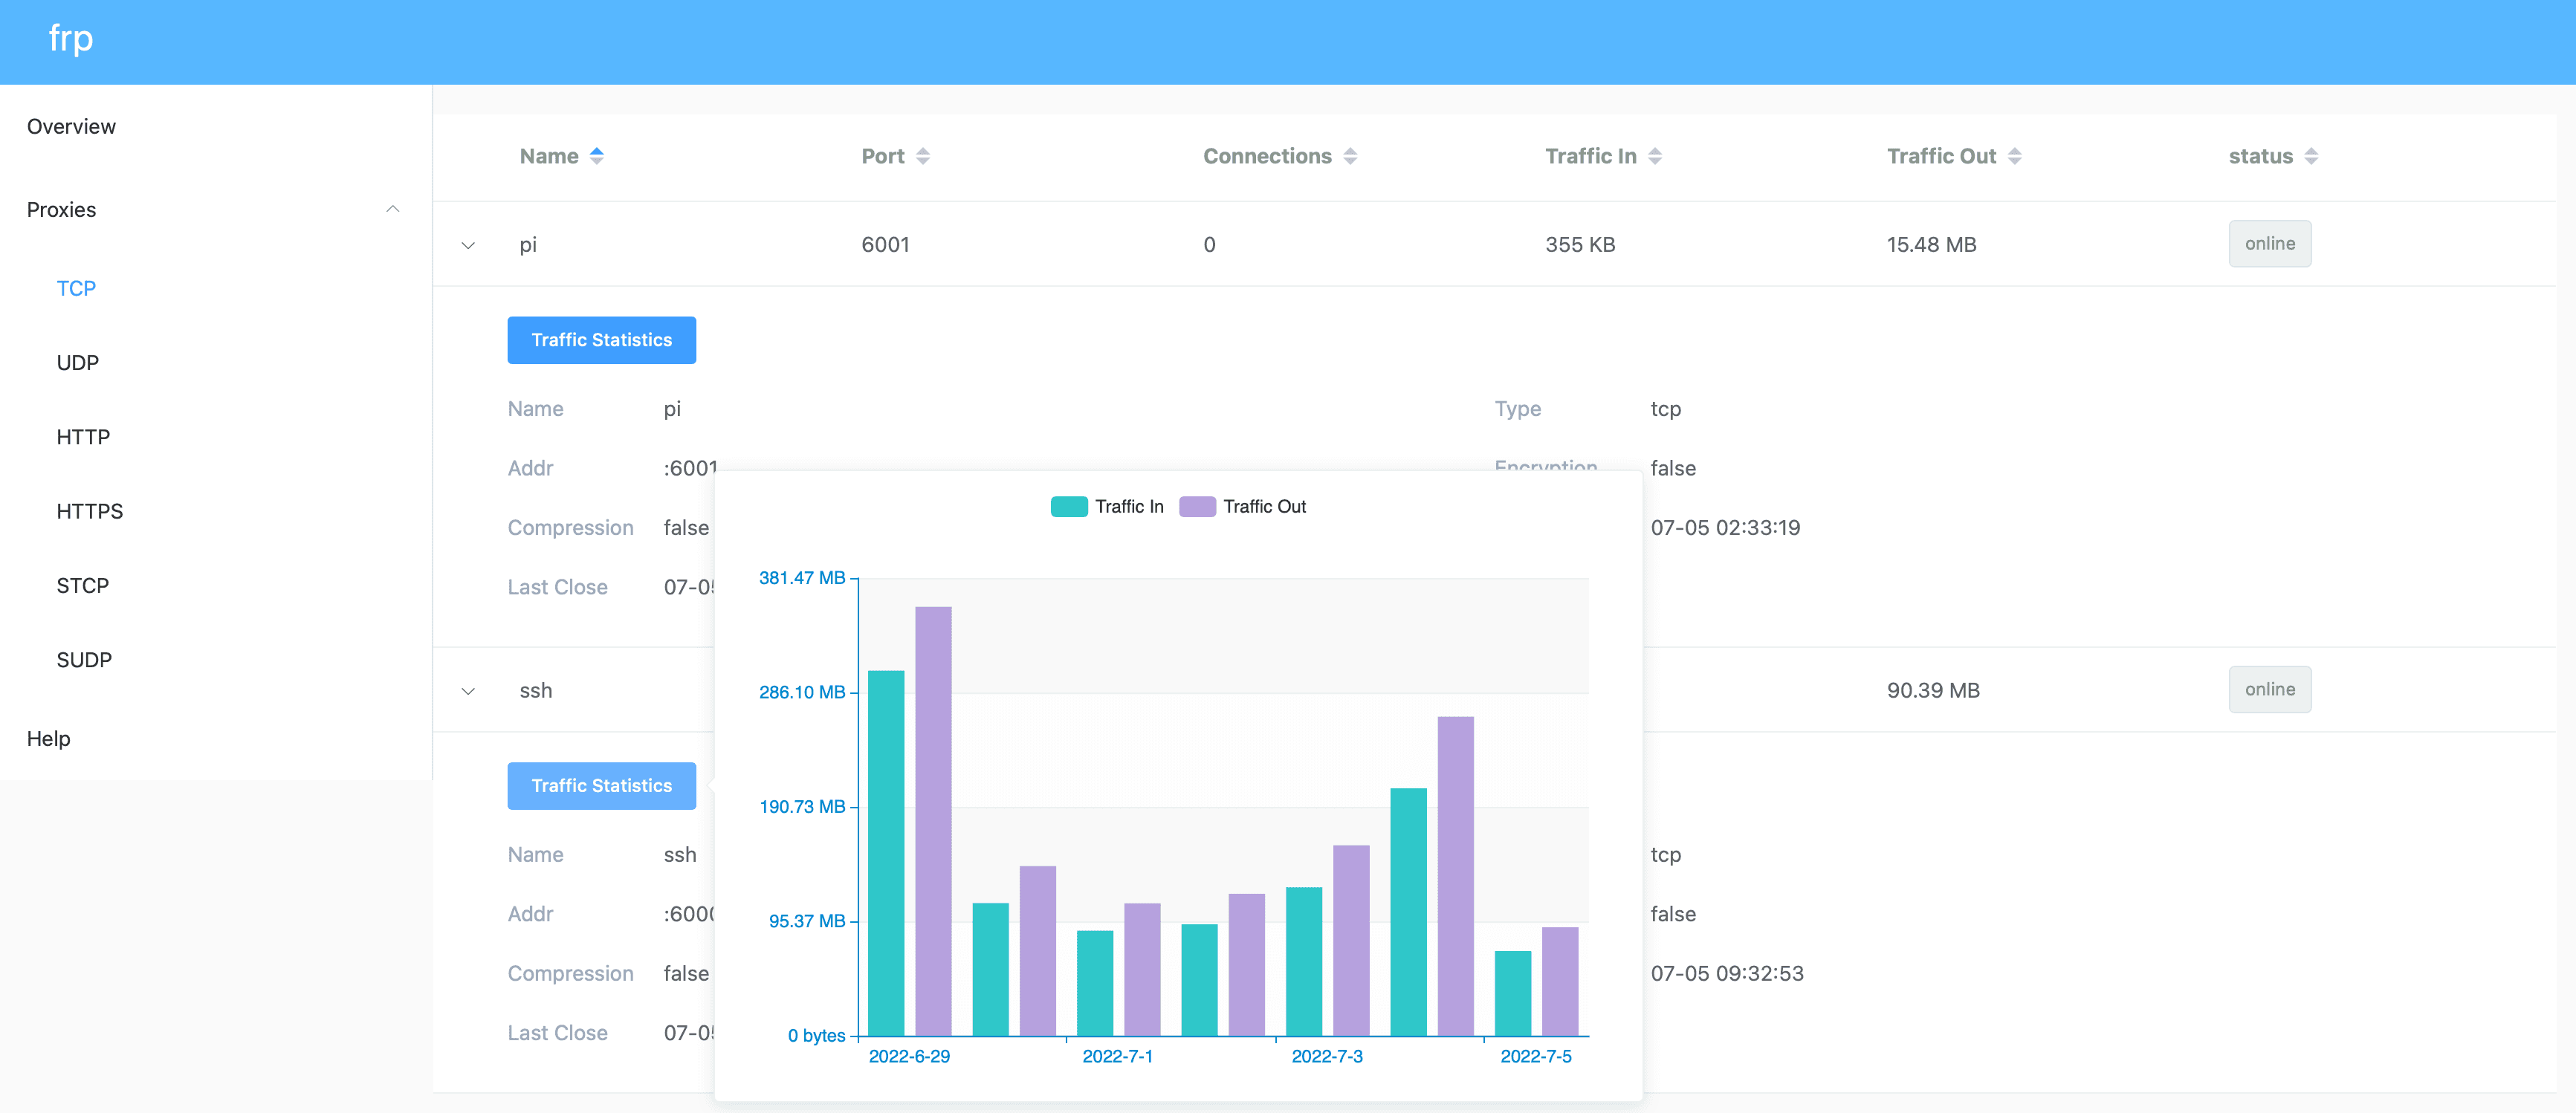
At this point, we can access our intranet services through the corresponding ports of the relay server in the public network environment, and both the server and client services will start automatically on boot. We can access the frp console by using <public ip>
+ the dashboard_port
configured on the server to view the traffic status of each service.
Conclusion#
This is my practice and summary of remote access to home devices and the thin client workflow, which brings a very interesting development experience different from traditional models. Interested readers can try it themselves. I hope this article is helpful to you.